FoxLAP – The DIY version
This is what you will get at the end of this tutorial. A complete working GPS LAP timer…
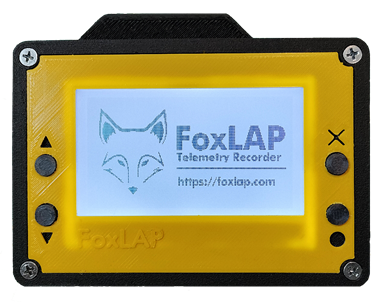
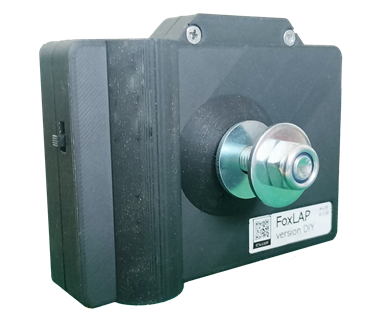
A complete working GPS LAP timer, yes, but with some limits.
Limitations: No external sensors (rpm, temp, EGT), no accelerometer. We can add accelerometer, temp sensor, and rpm to this device, but we will see that maybe in another tutorial.
This device is not really (completely not) water resistant, no battery management (only a physical switch power button). And finally something ugly inside with manual soldering and hot glue. Of course this is a quick and dirty implementation, i’m sure you can do better than i did. This is what i’ve done to create the first prototype to be able to start programming the firmware. I did it again for this tutorial but didn’t invest much time to get a high quality build. If you improve this, please share
Even with these limitations, you will get your lap times, gap with best, speed, sectors, theoretical best lap, live delta and so on… and you will be able to analyze your recorded GPS data (GPXRender software and with the online tool).
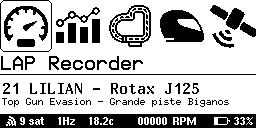
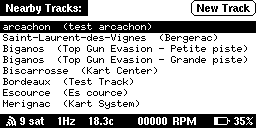
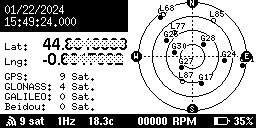
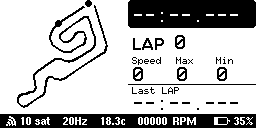
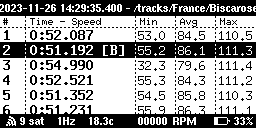
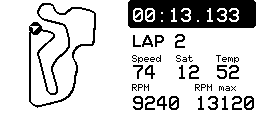

The goal of this tutorial is to create the simplest version possible. I started the development of this project on a version like this (in fact exactly the same). It brings back memories of going back to it.
This simple version is probably not the best, and it can be improved easily – we can obviously discuss choices i made, why blender?, why this display, why this MCU… But it’s there and it works So ready to go?
1- Required parts
This is what i used, mostly because i had most of these items available at home. some of this parts can be changed to more convenient, cheaper parts (depends on availability on your location). links to purchase these items are provided but i don’t have any interests on this… you are free to purchase where you want.
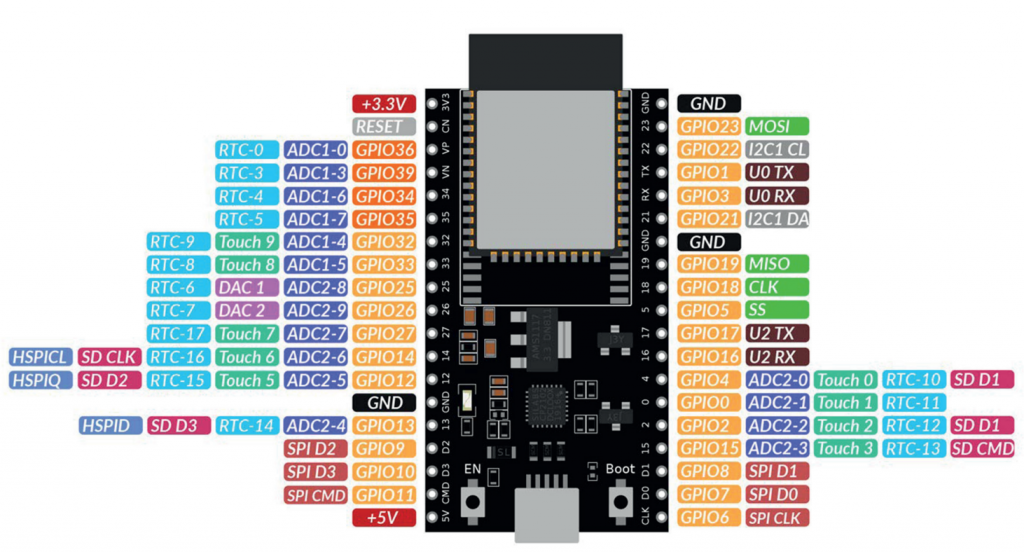
- 1, ESP32 ESP-WROOM-32 development board. Used: ESP32 Board (Usually around 5$ per unit)
- 1, Lithium Battery Charger. Used: Shield Wemos D1 Mini ESP8266 (1$)
- 1, GNSS Module. Used: Mateksys SAM-M10Q GNSS module (36$) (24$ for a cheaper ublox m8n)
- 1, display. Used: JLX 256×128 COG 5V White SPI (12$)
- 1, sdcard module. Used: Micro SD Card Shield (0.50$)
- 1, 18650 Battery. Used: 18650 INR18650-35E Samsung Li-Ion 3,7V 3450mAh (6$)
- 2, 10K resistors
- 4, 1K resistors
- 1, power switch. used: 2 position mini switch (6$ for 100 units)
- 1, micro sd card. Used SanDisk 16G or Verbatim 16G (5$)
- 4, push buttons 6x6x4mm. Used buttons
- Hot Glue and regular glue
- Wire wrapping. Used: link
- 6 M3 16mm screws
- 1 M8 30mm screws
- 2 M8 flat washer
- 4 M1.2×5 screws
More & important informations:
1- GNSS module: this tutorial is made to use the MatekSYS SAM-M10Q mounted inside the box. But you can use any Ublox GNSS module i guess. But please avoid cheap GNSS module replica, no, a 5 dollar GNSS chip can’t be good. You can find cheaper ublox GNSS modules like the m8n, but you will be limited to 10Hz (wich is not bad, alfano6 GNSS is 10Hz) and you will not be able to mount the GNSS inside the box.. it will be an external GNSS receiver, so you will have to adapt the 3D box model (i have 3D models for such cases). I had good results with this ublox m8n GNSS receiver: https://www.aliexpress.com/item/32748573256.html
This project is only compatible with ublox chips. maybe i will add some GNSS compatibility if they are proven to be good and affordable.
2- Display: this JLX 256×128 COG can be 5V or 3V. I used the 5V version because i already had it. The battery Shield used in this tutorial contains a 5V booster, so i used it to power the ESP32, the GNSS and the display. You can use the 3V version of this display but obviously don’t wire it directly to 5V. I chose the white backlight version simply because I prefer white backlights. This display must be the SPI model.
3- Micro SDcard: ESP32 can’t read SDcard FAT bigger than 32GB. So don’t use an sdcard larger than 32GB (or you will have to create a 32GB partition on it first). 16GB for this project is already huge, you don’t need so much space. But as the GNSS module, don’t use noname Sdcards, you will face a lot of troubles (read, write errors… complete headache with these cheap noname sdcards to finally throw them angrily in the trash).
4- Battery 18650: Also, don’t be fool, don’t purchase noname battery advertised as 12000 Mah, or you may have surprises. The battery +/- poles must be flat.


with batteries that have a button on the poles, it may be impossible to put the battery in the slot provided in the box.
2- 3D Print
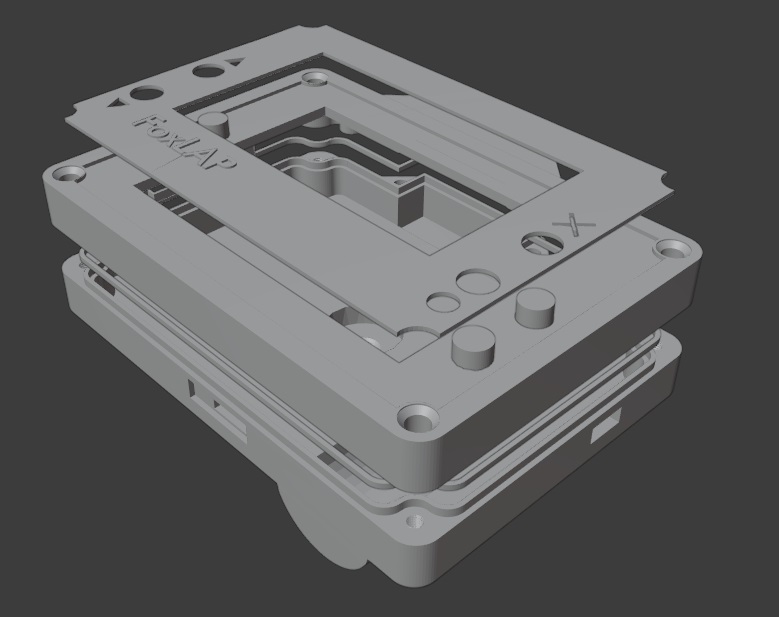
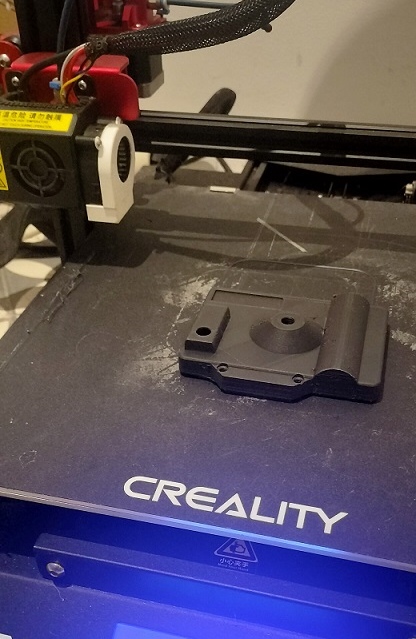
- STL files were created using Blender.
- 3D Printer: Creality CR10s PRO.
- Slicer: I used Cura to slice the 3D models
- 3D filament: i used the 1.75mm ZIRO Filament PLA with carbon fiber. Amazon link: https://www.amazon.com/dp/B01IICFS4Y/
- Print settings: 0.4mm nozzle, Standard quality (0.2mm), 40% infill, Support (zig zag support)
- Print Speed: Usually I set the speed to 60% of the maximum speed the printer can achieve. Because I saw that the more I increase the speed, the more faulty prints I get.
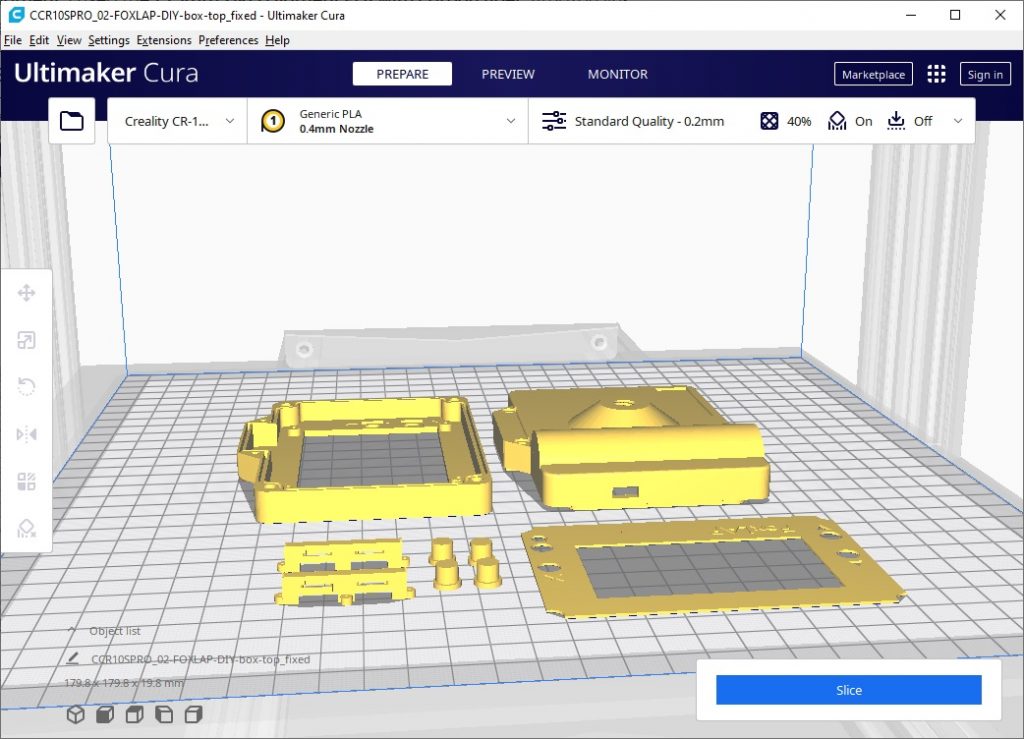
I’m not a 3D print guru, I had my best results printing the STL models this way. I assembled all the STL parts only to show you how I placed them but actually I printed the STL parts piece by piece, not all together as shown in the screenshot.
There is also 2 other parts printed with flexibale filament. You will need 2 parts for the M8 flat washer… It will help you to mount the Lap timer on your wheel. But this filament even if it’s a good filament, is expensive and you will probably don’t want to purchase a complete coil for just 2 small pieces. You can try to print them with regular PLA.
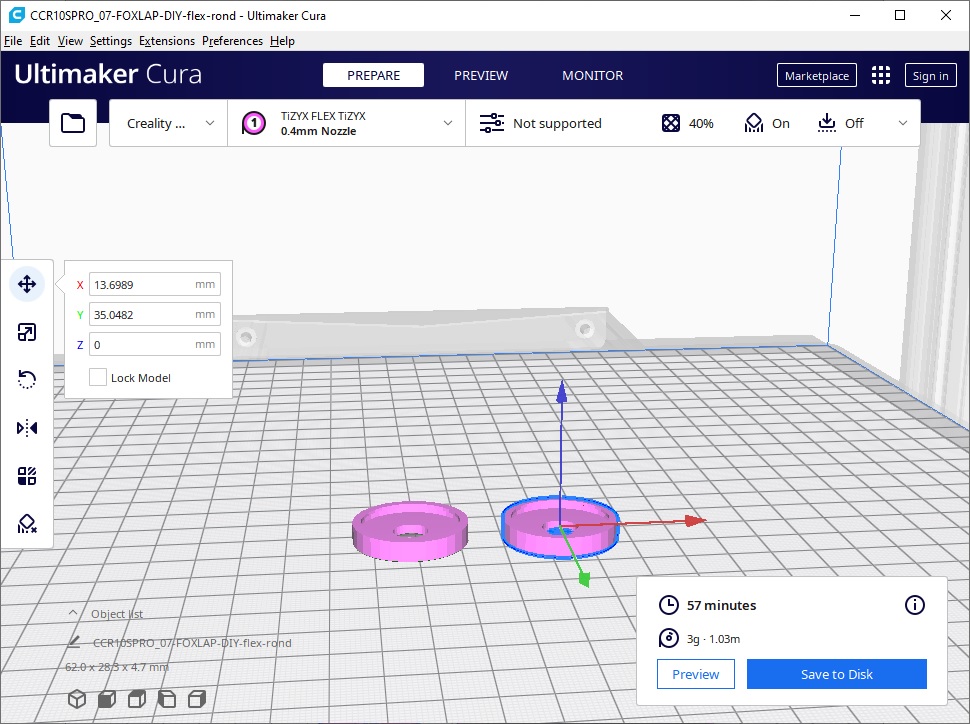
Here is the STL files you must print:
- 01-FOXLAP-DIY-Overlay.stl: 1 print (you can use a different color for this part)
- 02-FOXLAP-DIY-box-top.stl: 1 print
- 03-FOXLAP-DIY-box-bottom.stl: 1 print (print this one if you don’t want external sensors)
- 03-FOXLAP-DIY-box-bottom-ext.sensor.stl: 1 print (print this one if you want external sensors)
- 04-FOXLAP-DIY-buttons.stl: 4 prints
- 05-FOXLAP-DIY-buttons-support.stl: 2 prints
- 06-FOXLAP-DIY-flex-rond.stl: 2 prints
3- Assembly guide
Starting from here, you must have the printed box and the electronic parts in your hands. Here is the complete wiring schem. Even if it is a very simple schem, it requires a lot of wires.
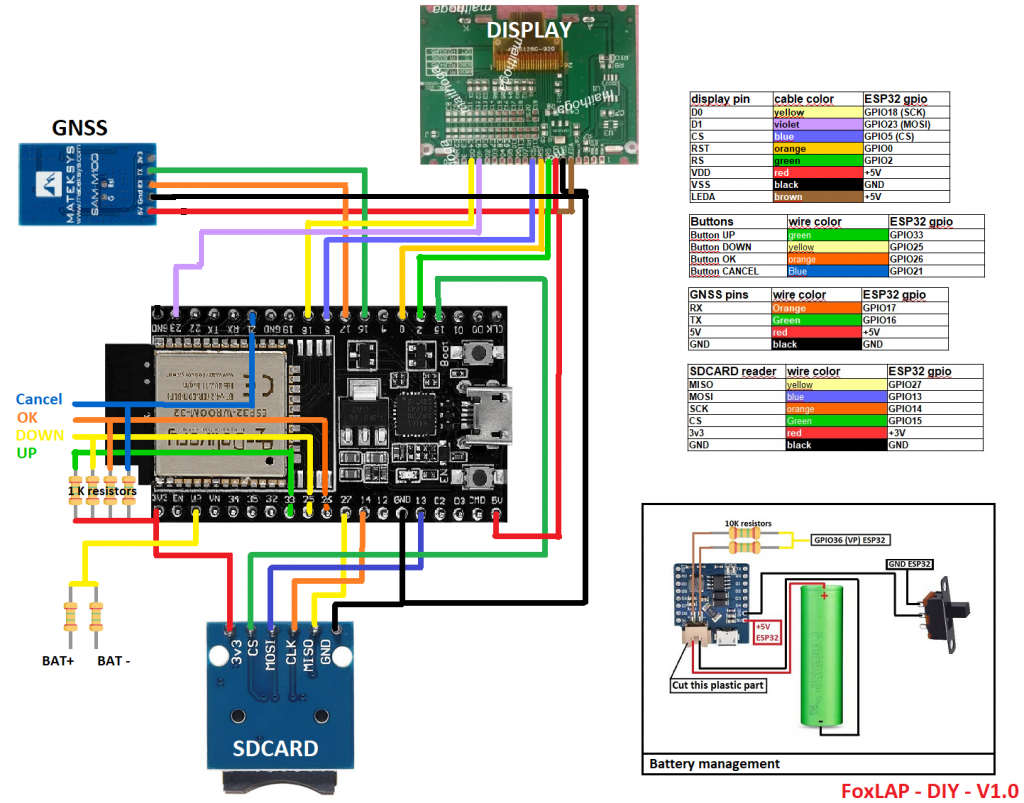
3.1 Buttons assembly
Insert your 4 buttons in the buttons holder you previously printed.
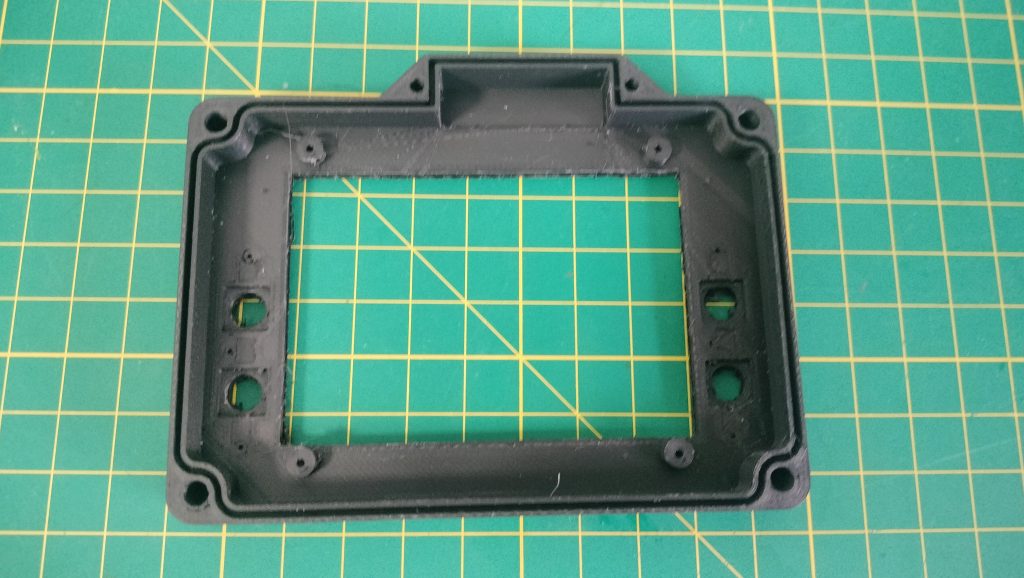
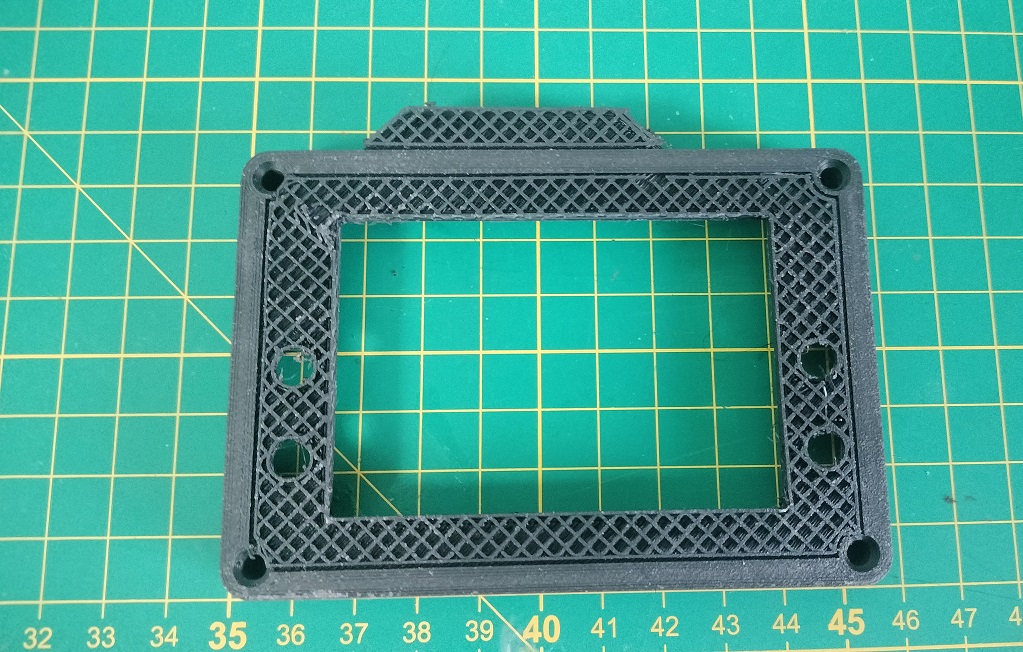
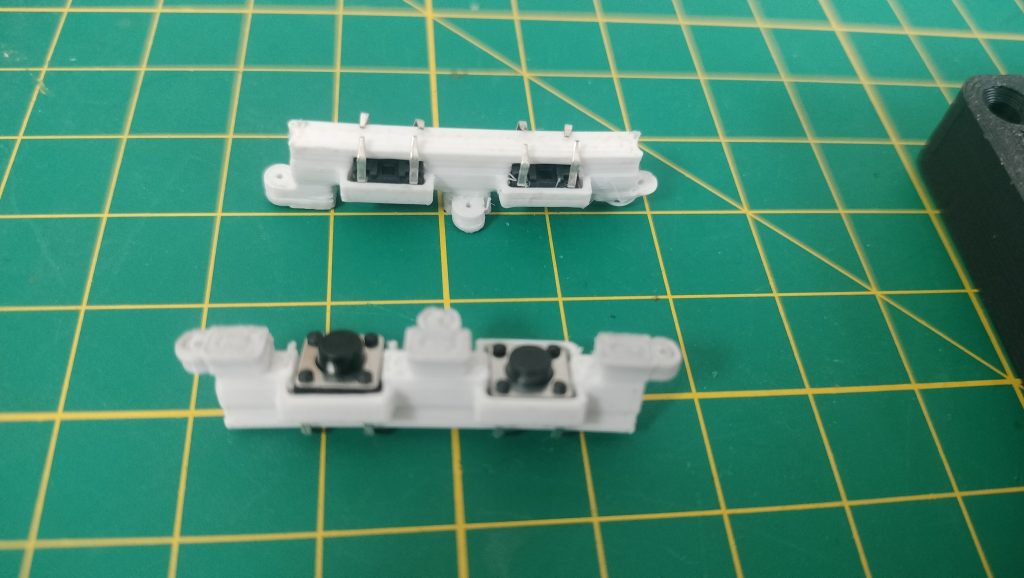
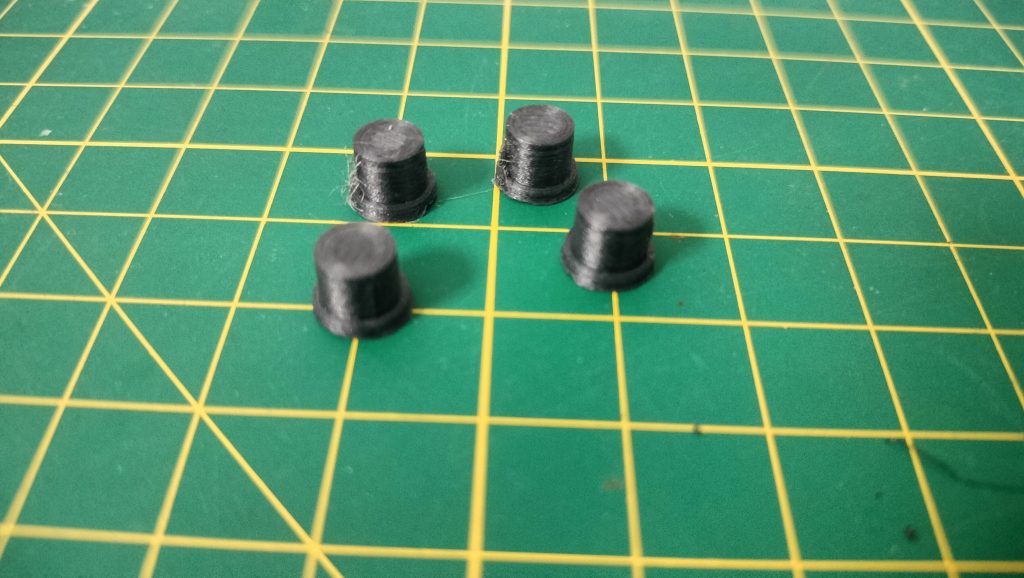
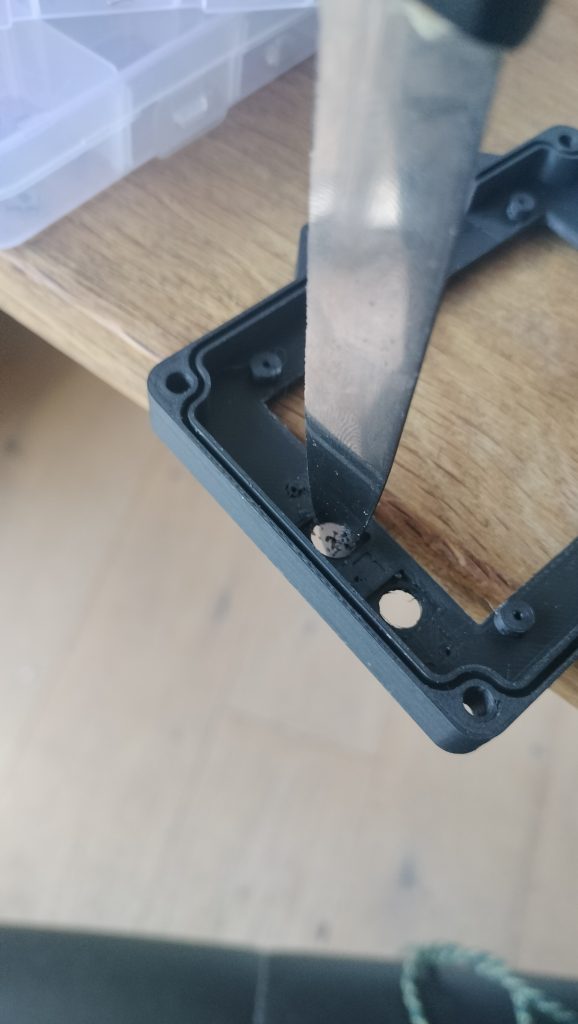
Make sure that the buttons slide well without constraints, enlarge the holes if necessary (There can sometimes be excess material left from 3D printing)
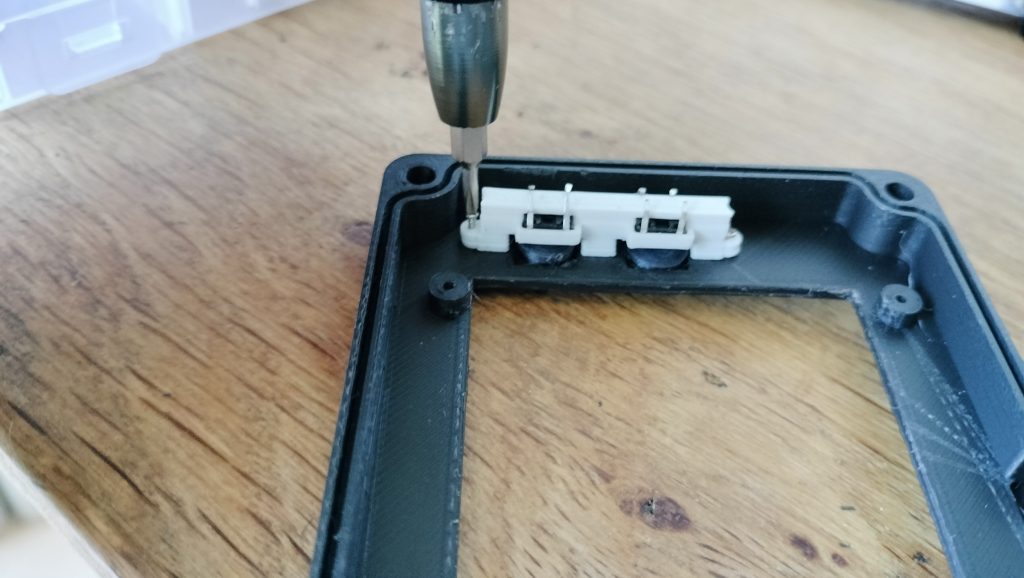
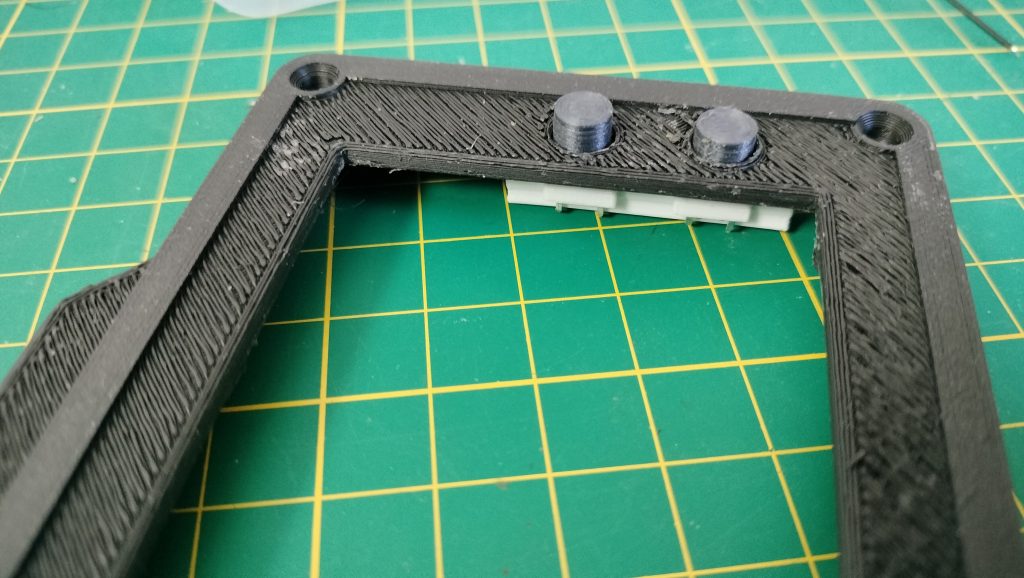
Then now assemble the buttons holder part using M1.2*5 screws. Do it for the left and right buttons
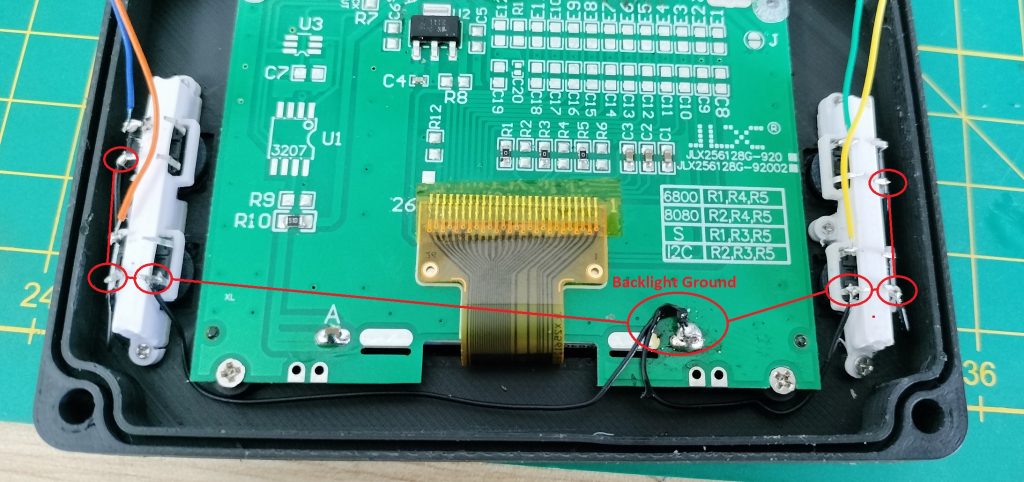
Connect buttons ground pins together. connect them to the display “K” ground pin. Wire each button with a different wire color, it will help you to to solder them to the correct ESP32 GPIO later.
It’s time to add the 4 debounce resistors on the buttons.
IMPORTANT: If you are not willing to use external sensors, you may not have to add the debounce resistors (even if it’s not recommanded). But you must add them if you are willing to monitor Temperature and RPM.
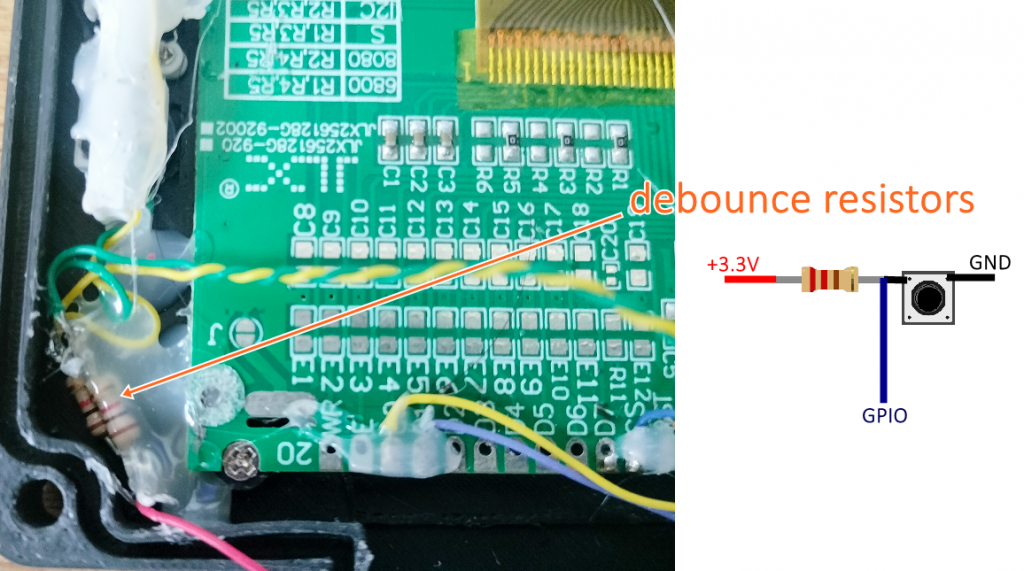

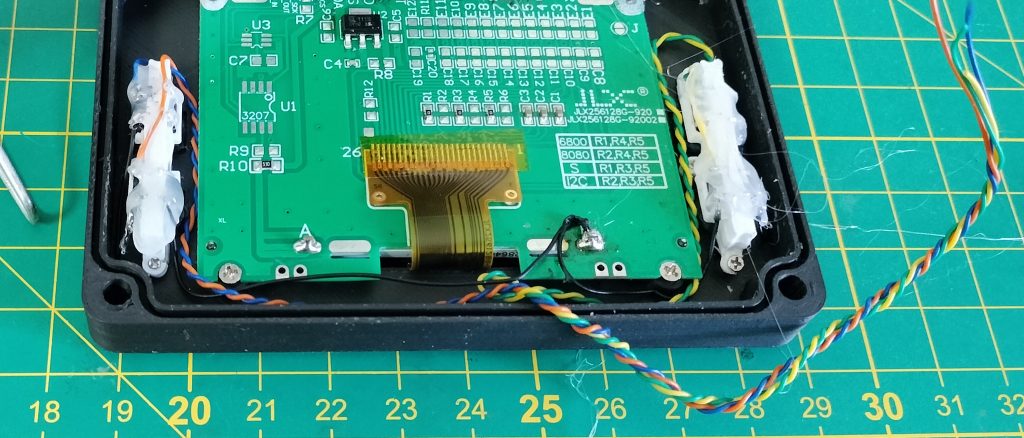
Use hot glue on all welds, remember vibration is our enemy. Leave enough length for your cables as you will have to solder them to the esp32 located in the other part of the box
3.2 Display assembly
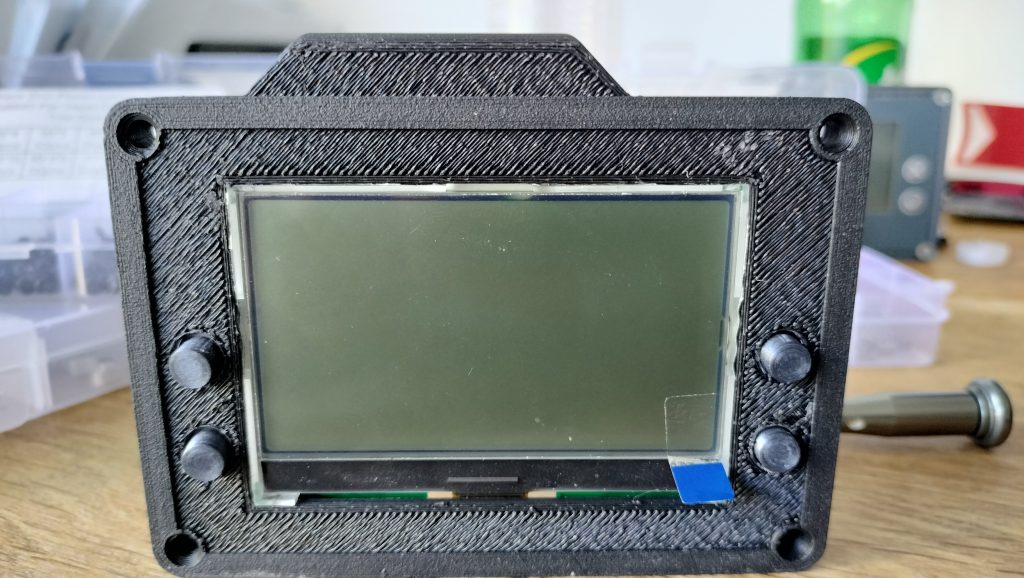
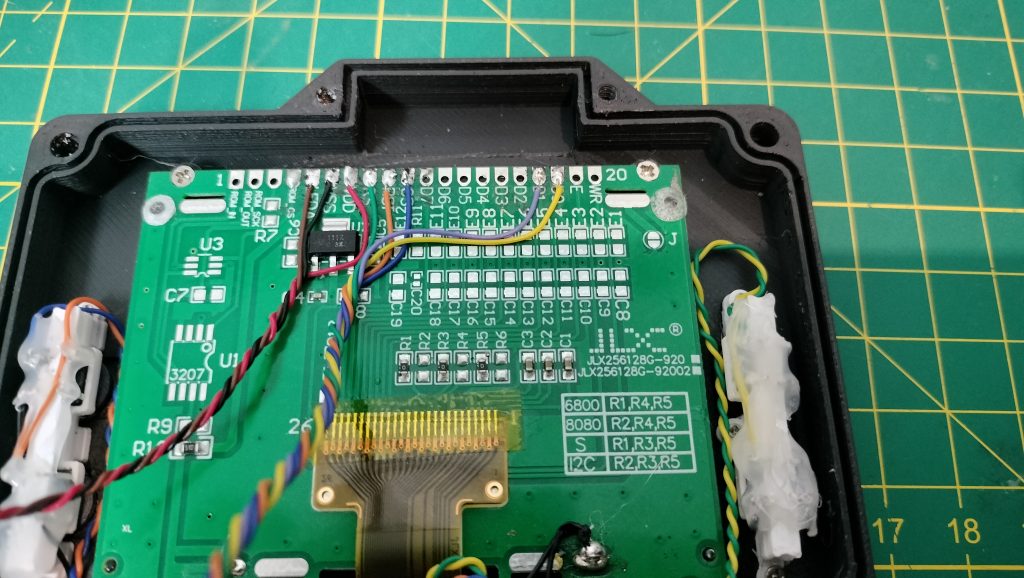
put the display and screw it. You can add hot glue to adjust the display and make sure it don’t move.
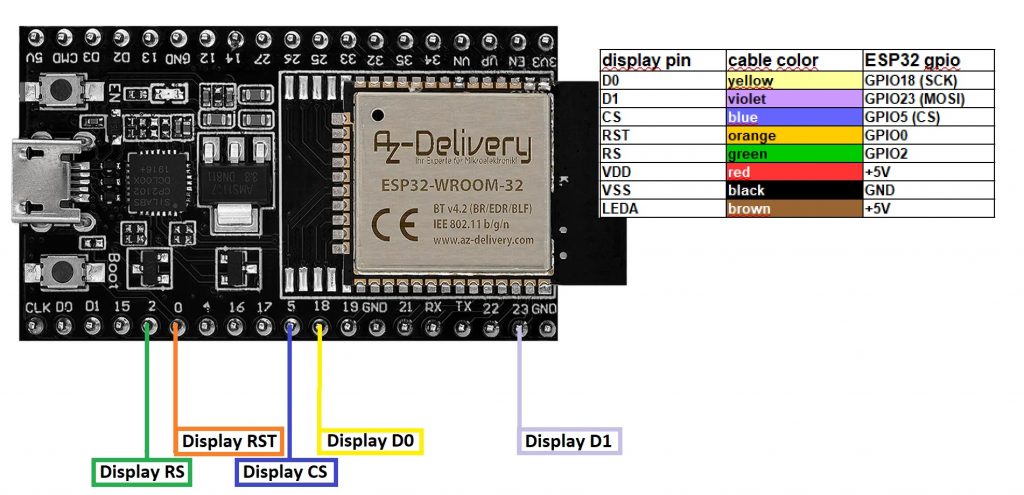
Here is how you will need to connect the display to the ESP32. Prepare the cables on the display, but don’t solder them now to the ESP32. Again, leave enough length for your cables as you will have to solder them to the esp32 located in the other part of the box
3.3 Bottom part assembly
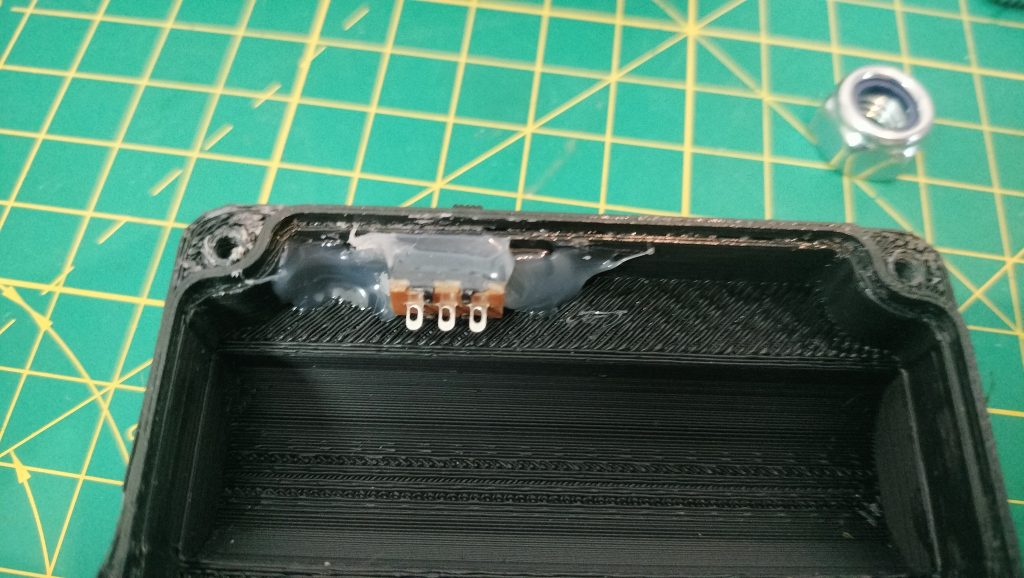
Place the power on/off switch and hot glue it.
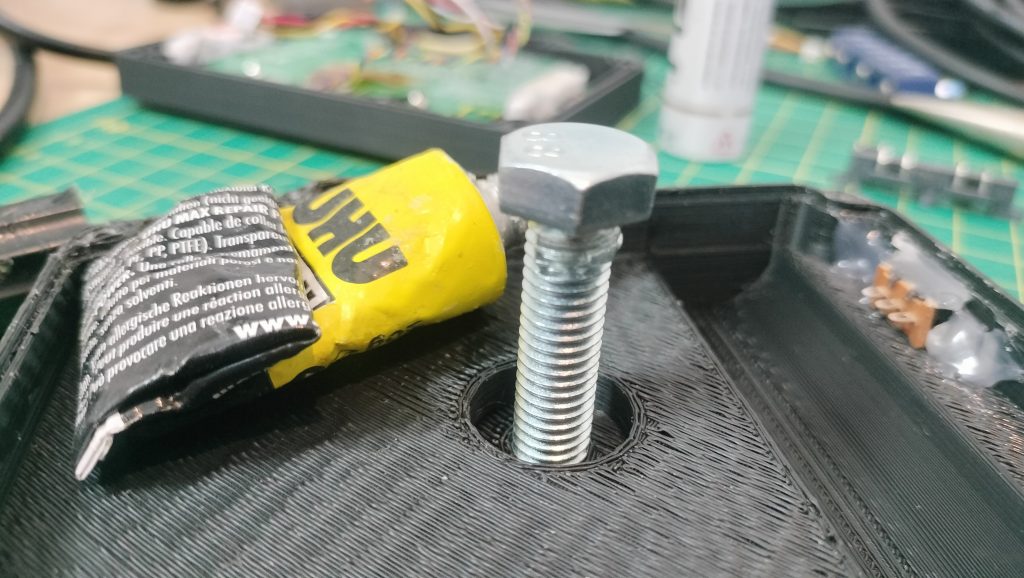
Place the M8 30mm screw add regular glue at the top of the screw, then screw it.
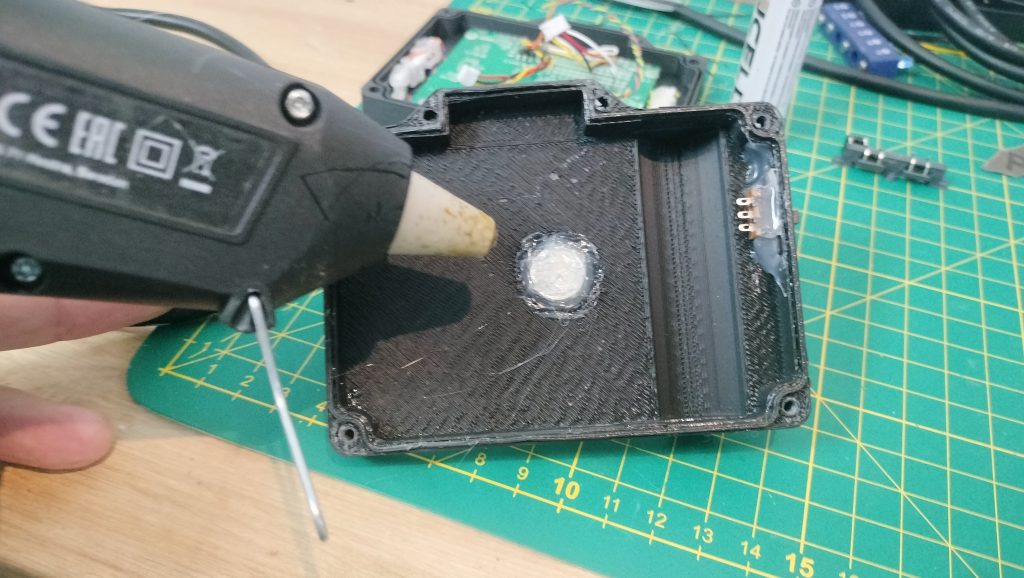
insert Hot glue inside remaining space where the M8 head inserted.
3.4 Variant with external sensor box
If you build the case to host the external sensor box, you must add the M8 connector provided in the external sensor pack. If you don’t want the external sensors, you can skip this part.
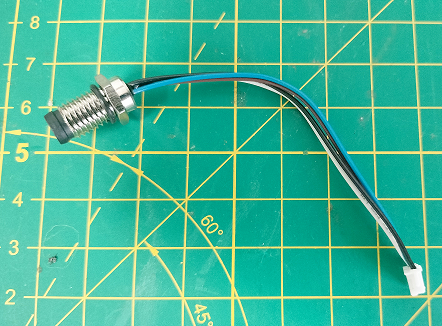
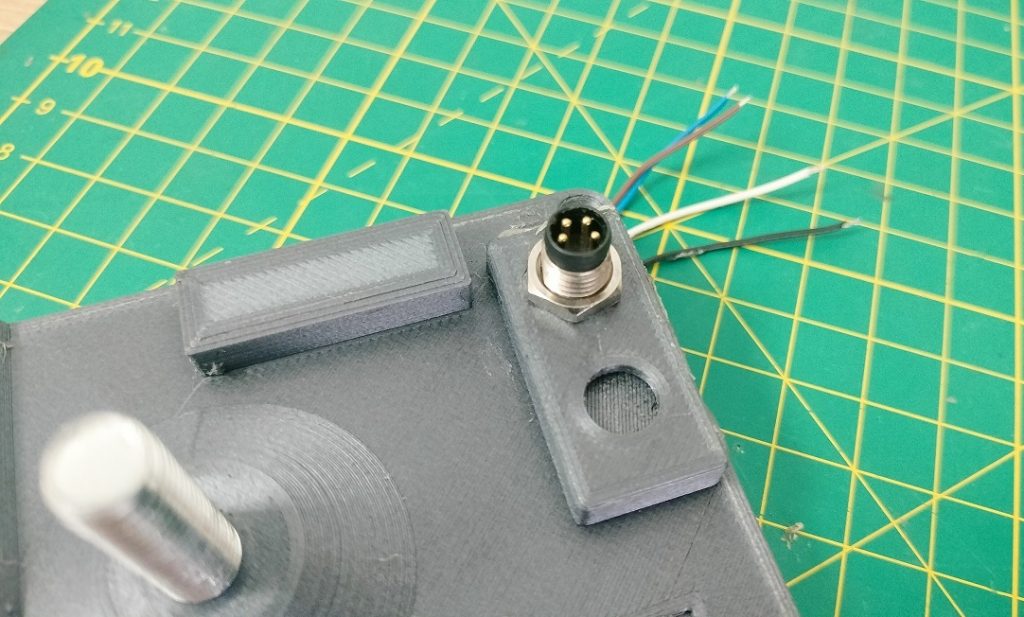
Fill the space where the M8 connector is installed with hot glue. I recommend this in order to solidify this part, in fact, a cable will be connected here and if the cable is torn off brutally (shock, crash), the cable could damage the case by tearing off the connector.
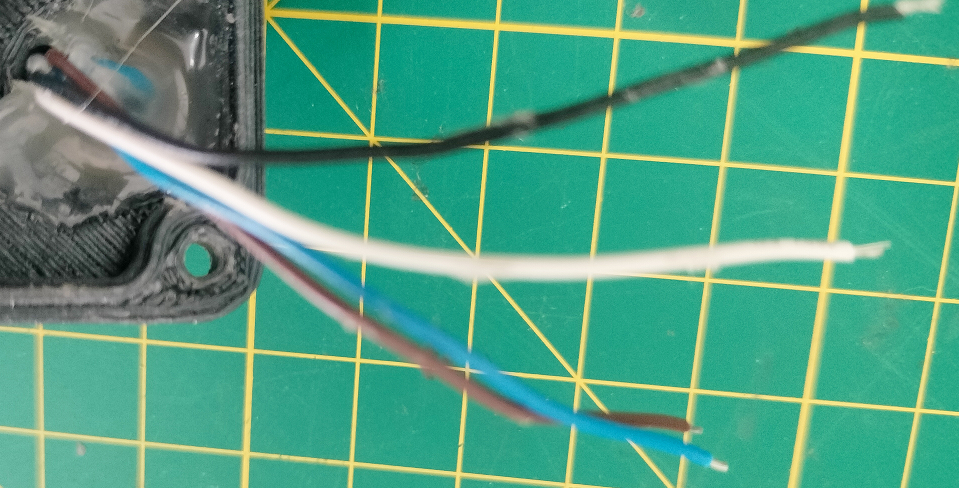
Keep these 4 wires. you will have to solder them to the ESP32 when it will be installed in the case.
Blue -> +3.3V
Brown -> GND
White -> GPIO35
Black -> GPIO34
Regarding Ground: Especially true if you want to use external sensors, use star ground as grounding technique to minimize noise and ground loops in the electronic circuits. all ground connections in the circuit converge to a single central point. This prevents ground currents (return currents) from flowing through unintended paths, which could cause voltage drops or noise interference in sensitive parts of the circuit.
Go to https://foxlap.com/tutorials/foxlap-external-sensors/ to get more info about the external sensors part
3.4 Battery assembly
Take now your 18650 battery. Use a spot welder to add Nickel strips to your 18650 battery.
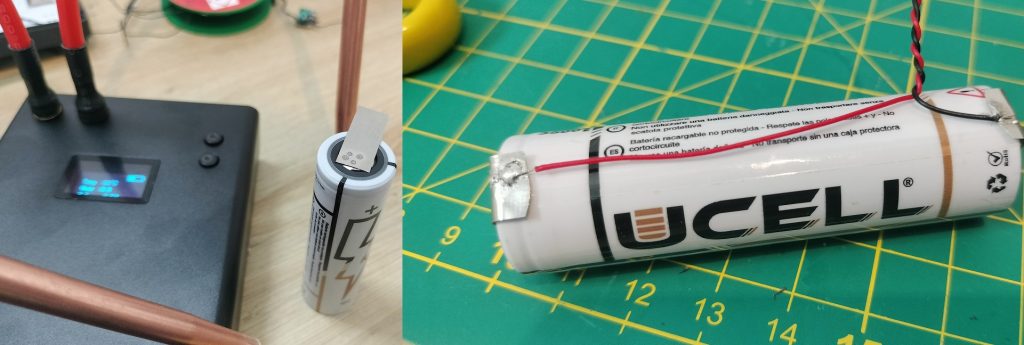
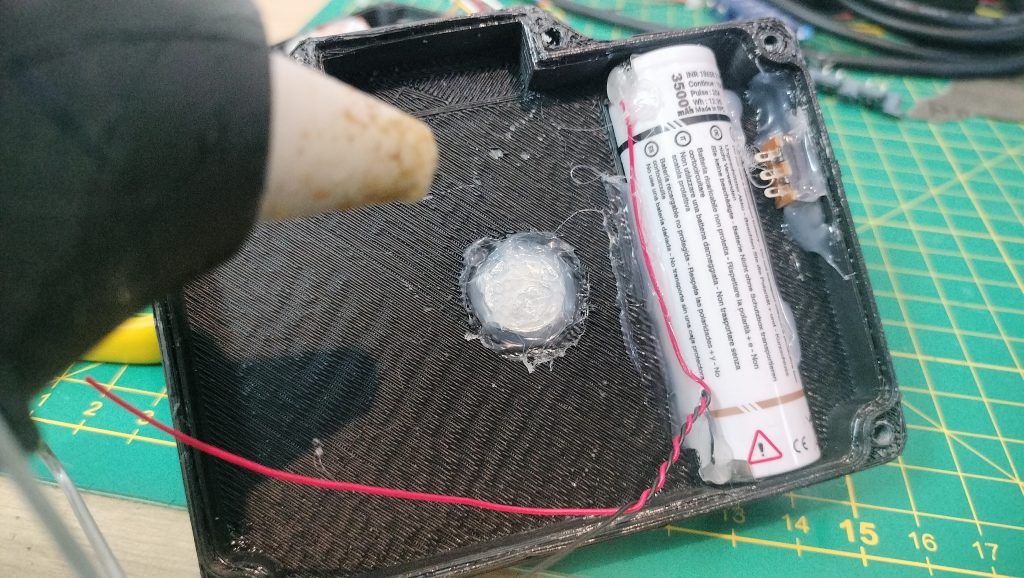
place your battery inside the box and add hot glue in order to get it stuck
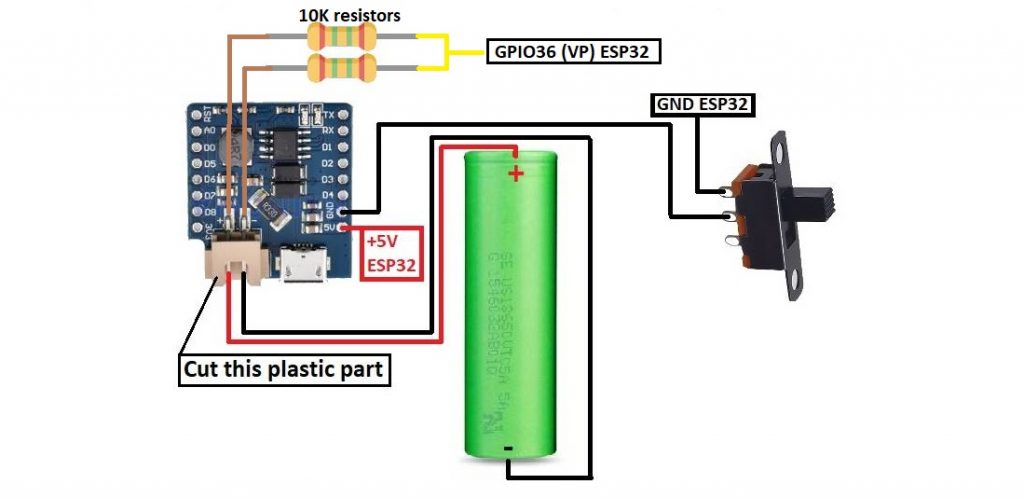
follow this schem to add the Lithium battery charger.
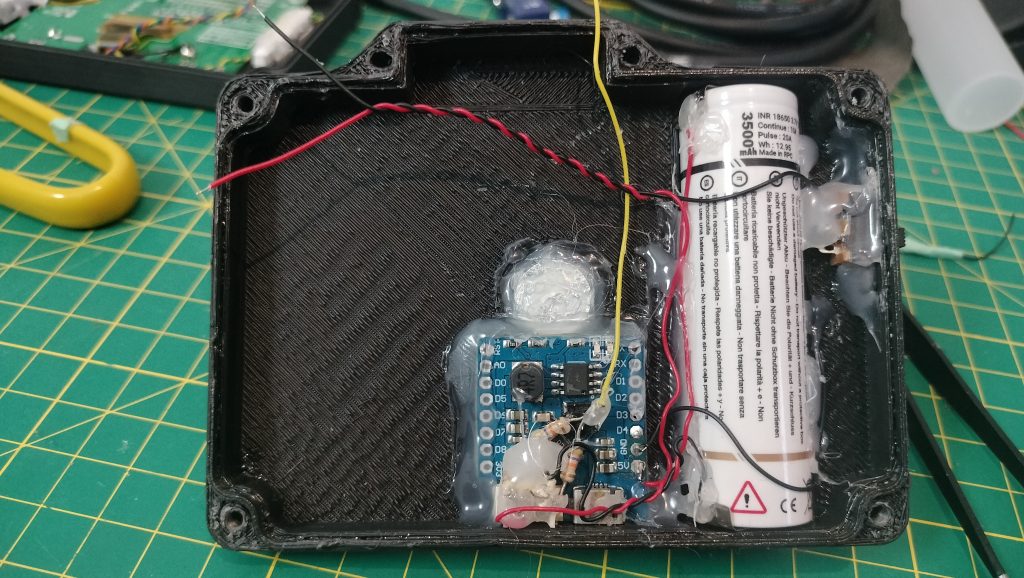
You must now have something like that. Make sure the switch button is OFF during the following steps. You can also check now that you can charge the battery and can measure +5V at the 5V/GND pins of the Lithium battery charger board.
The 10K resistors from +/- will allow us to read the battery level using ADC. That’s clearly not the best way to get the battery level info, but remeber, this tutorial aims to create a simple and cheap version. It will gives you an estimation of the battery level.
3.5 GNSS assembly
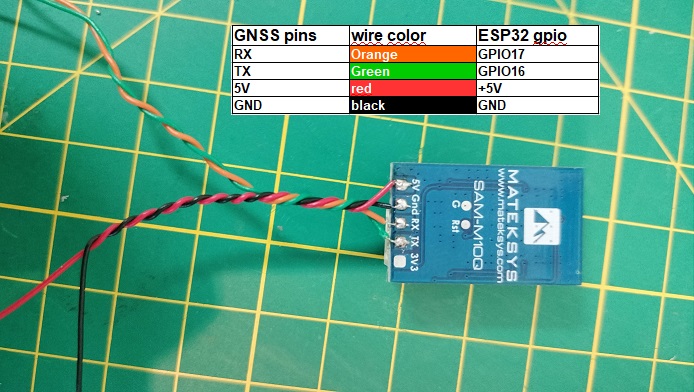
Take your Mateksys M10Q. Prepare wires and solder them accordingly
3.6 SDCARD assembly
3.7 Wire to the ESP32
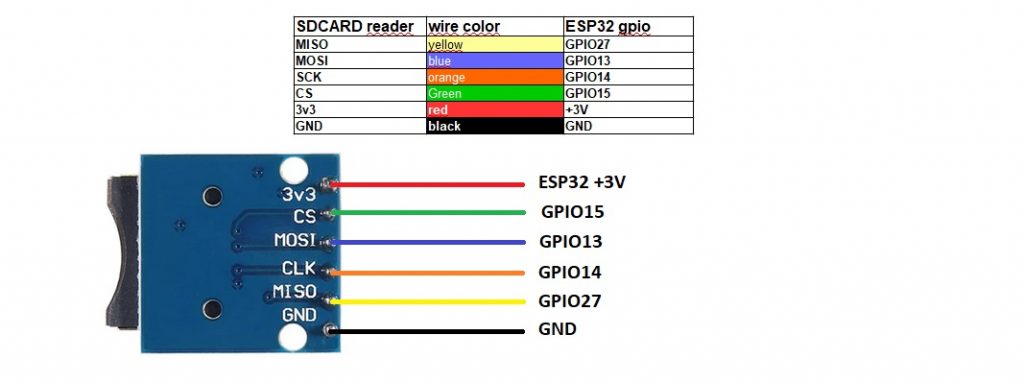
the sdcard reader module i used here is not exaclty the same as the one i gave in the parts list. This one is too big, but i had only this one when i wanted to reproduce the DIY device based on this tutorial, i did’nt want to purchase the required SDmodule just for that. Use the one provided before.
Or you can use an SDCard adaptor, yes it works…
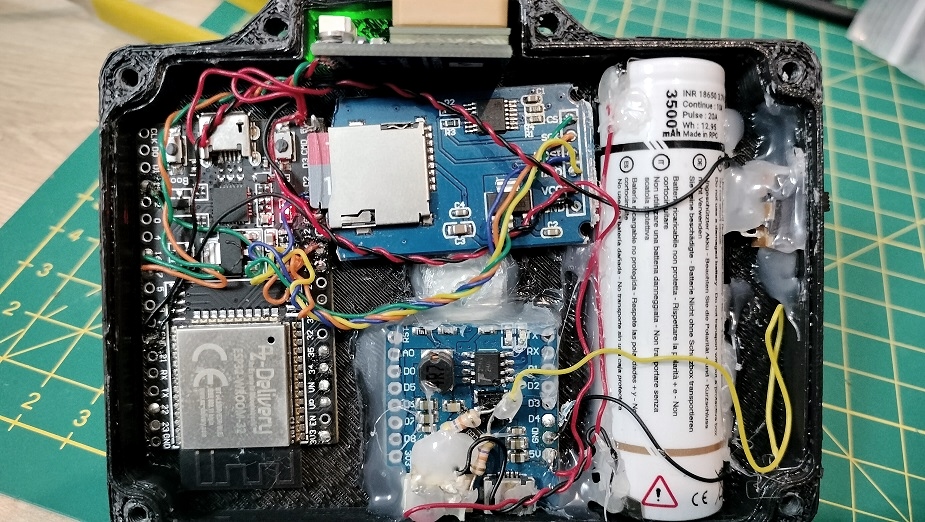
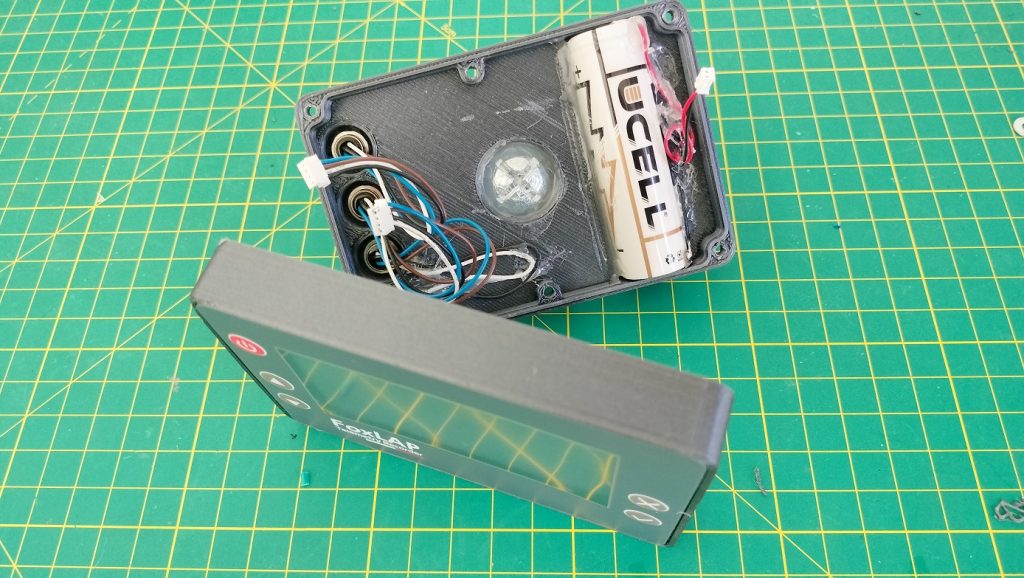
Now solder your wires to the ESP32 related GPIOs. It is becoming quite ugly right? 🙂
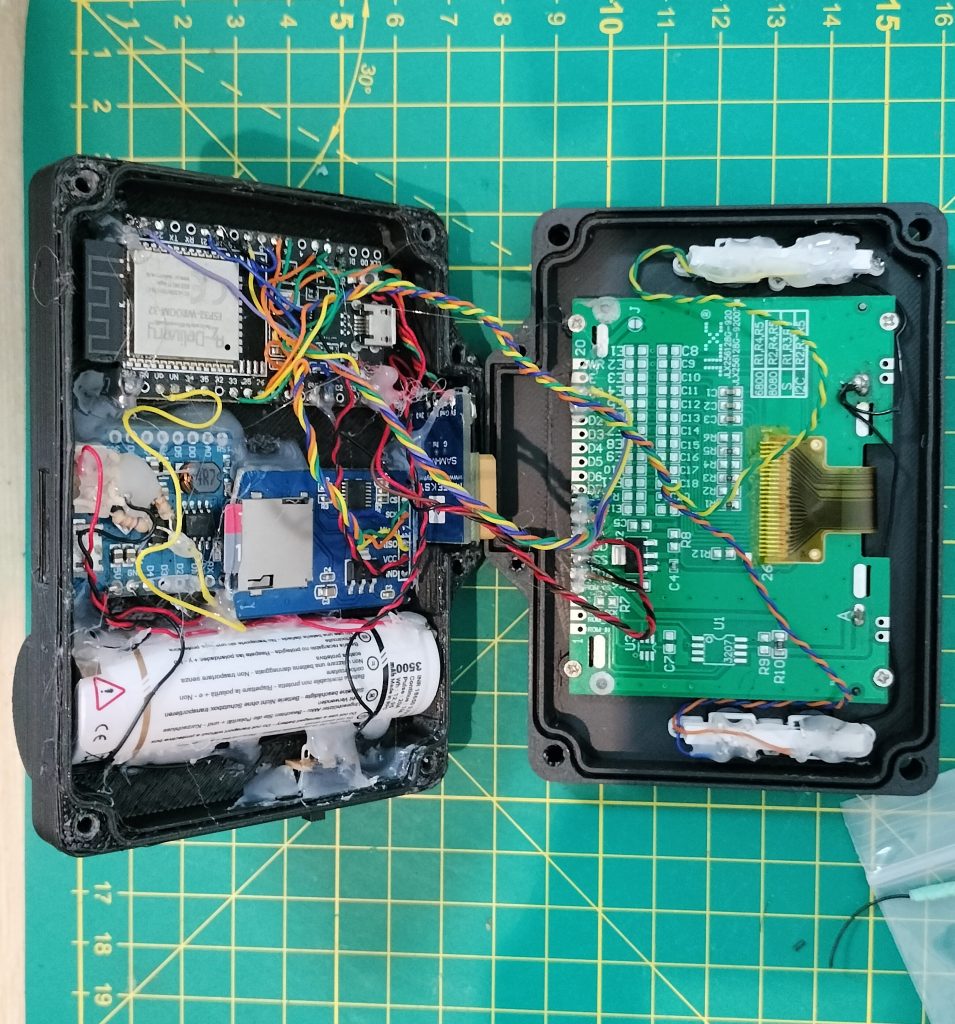
Connect now the wires of the display and buttons to the ESP32
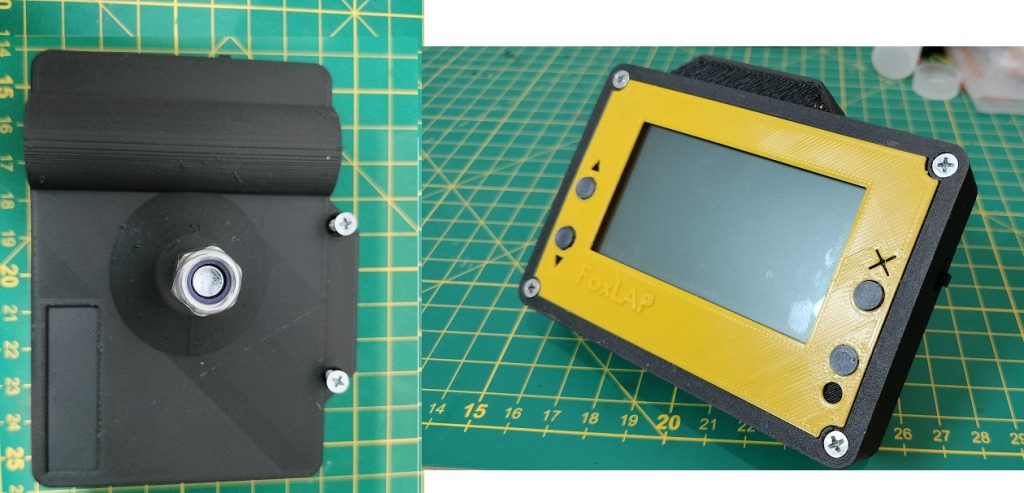
(Only after Point 4 and 5 have been completely done)
But before closing the box, you have to flash the board with the firmware. See Point 5. Firmware installation to do it.
Close the box and seal it with 6 M3 16mm screws. And also Glue the front panel. I printed it in yellow, but yellow is not mandatory 🙂
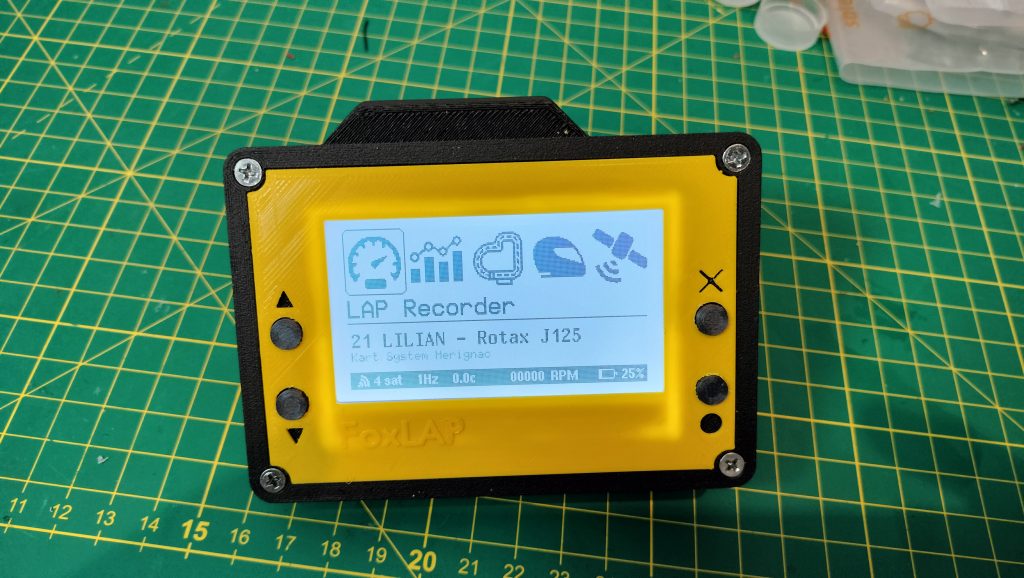
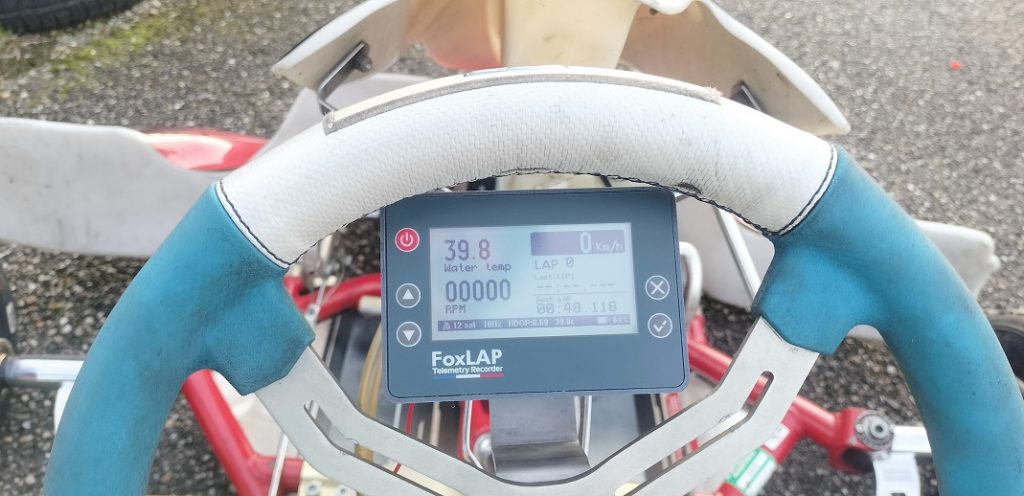
It must be working now… And it’s looking better when you don’t see what is inside.
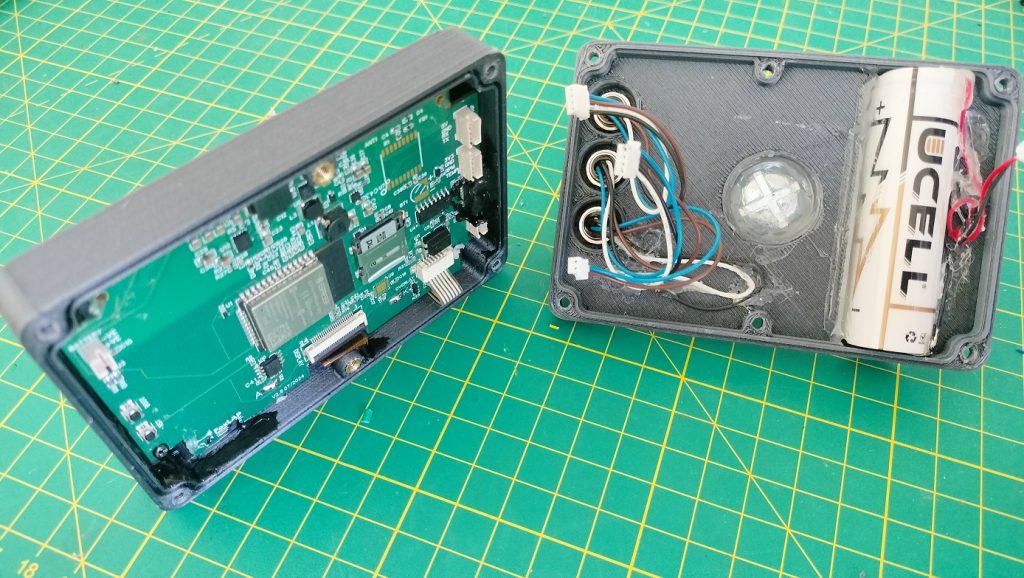
Obviously the dedicated board version is easier to assemble. The dedicated board includes larger display, and way more functionnalities. Go to this page if you are interested by the dedicated board version
4- Prepare your SDcard
More than 32GB partitions will not be recognized by the device. So make sure you are not using:
1- A bad no name SDCARD.
2- A partition more than 32GB. If your SDCARD capacity is more than 32GB, you will have to create a partition of 16 or 32GB and the extra space will be lost.
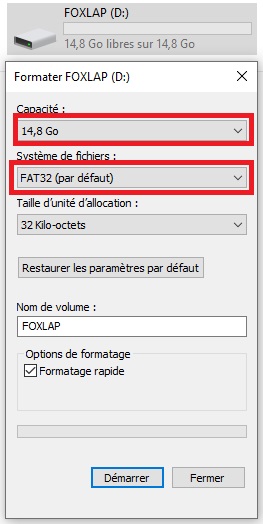
Format your SDCARD using FAT32 filesystem. Once it is done, your sdcard is empty and you can insert it into the device.
5- Firmware installation
Download this zip file containing the firmware and the tools to flash the board.
Version 1.70 – release date 2025/12/15
What’s new in version 1.70:
- Memory optimizations
- New race display introduced
- Various minor bug fixes
5.1 Flashing on windows operating system

Unzip the content of the downloaded archive. USB Plug your ESP32 board to your computer. then launch the file “flash_firmware.bat”. You will be prompted to enter the COM number to communicate with the board. Enter it like this: COM6 (obviously if the board is communicating with another COM number, change it accordingly… don’t contact me because COM6 is not recognized).
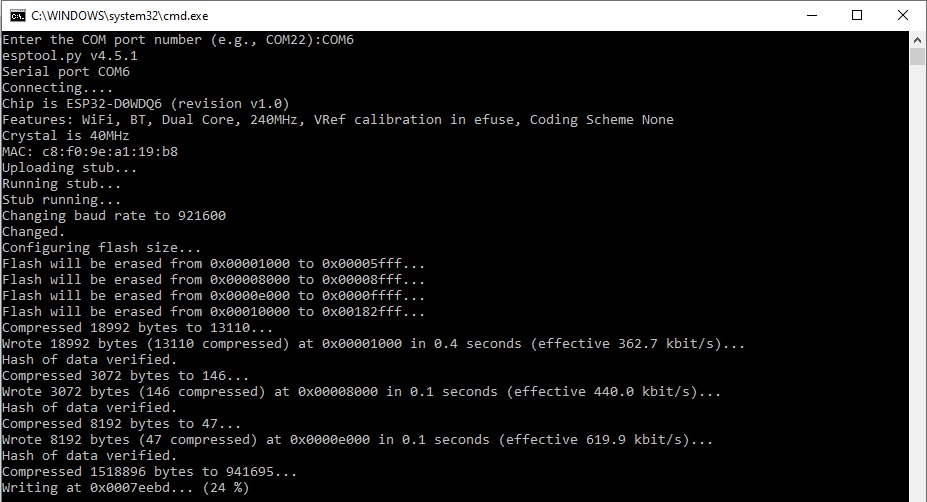
Or you can enter directly the following command
esptool.exe --chip esp32 --port COM6 --baud 921600 --before default_reset --after hard_reset write_flash -z --flash_mode dio --flash_freq 80m --flash_size 4MB 0x1000 foxlap.DIY.bootloader.bin 0x8000 foxlap.DIY.partitions.bin 0xe000 boot_app0.bin 0x10000 foxlap.DIY.bin
Now Hard reboot the board. OK, now the device must be working…
5.2 Install a new firmware on an exising and running device
Start your foxlap device. then select the menu “WiFi transfer” then “Start WiFi“. If you did not set a wifi password, do it on the device by selecting “WiFi transfer” -> “Set wifi password” (your password must be 8 characters length minimum.
Once it is done and your device is running in Wifi mode, you must see “Wifi Data Transfer” on the screen with the name of the created hotspot. (FoxLAP_xxxxxx). On your computer, connect the wifi to this hotspot (be careful, passwords are case sensitive)
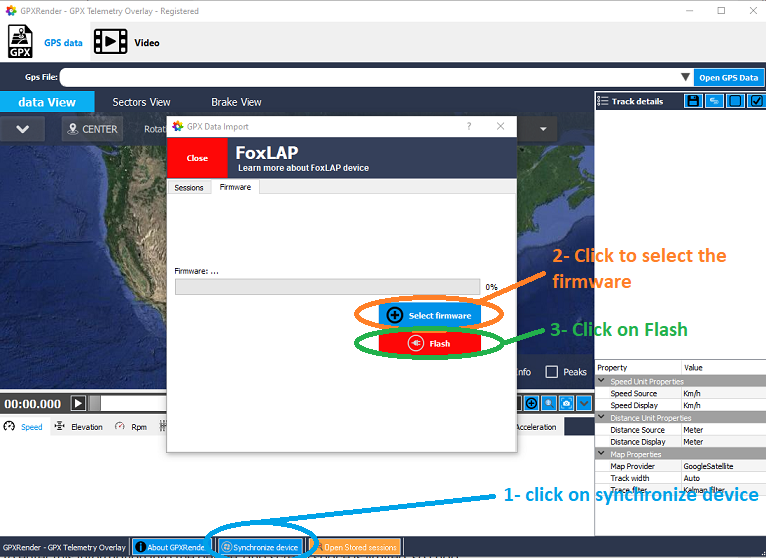
Then open the software GPXRender (available on this website). Click on “synchronize device”. If your are connected to the device, a window will popup. Go to the “Firmware” tab, then select the new firmware file and then click on “Flash”. You are now able to flash device without the need of dismounting it
6- First launch and configuration
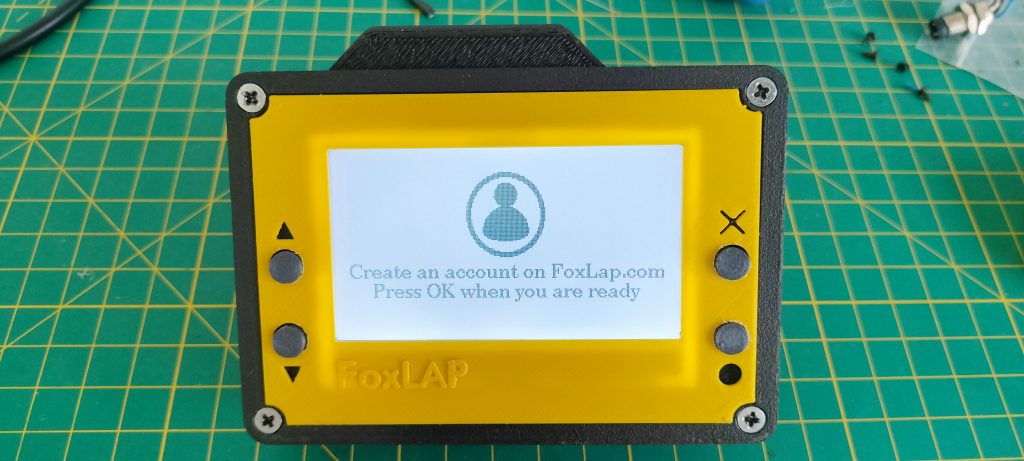
On the first launch, you must get this screen. If it is not already done, create a FoxLAP account here
You need to enter your name, select a password, etc. Some characters are not allowed, so be careful. You’ll need to enter this information into the device, and screen space is limited, so I had to make choices about which characters were allowed or not.
Only these characters are allowed at this time: 0-9, a-z, A-Z, ! # $ % & ‘ ( ) * + , – . @ : ; =
What you will need to enter on first launch is shown in this video. The device will must be able to connect to the internet, that’s why you will have to enter Wifi credentials. You can have some issues with passwords containing special characters not supported by the device, in that case, you can share your connection via your mobile creating a hotspot with a password containing characters supported by the device.
If the connection is unsuccessfull, shutdown the device and restart to retry
Once the connection is successfull, the device will retrieve the settings stored on your account available at that page https://foxlap.com/mydevice.php
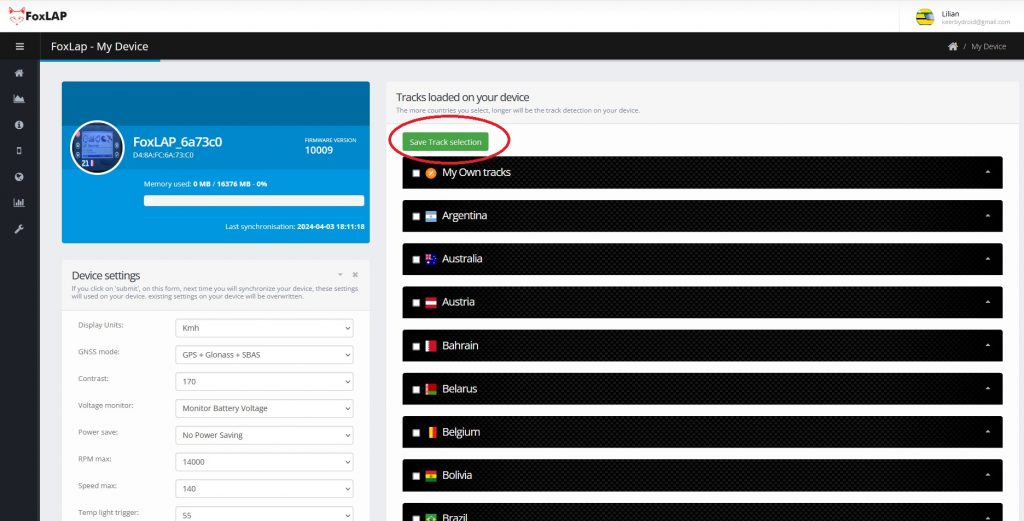
You will be able to change settings and also select/unselect available tracks on your device. Don’t select all tracks. Only select tracks from your country or the ones you will use. The more you select tracks, longer will be track detection. don’t forget to click on “Save Track selection” when you change selection.
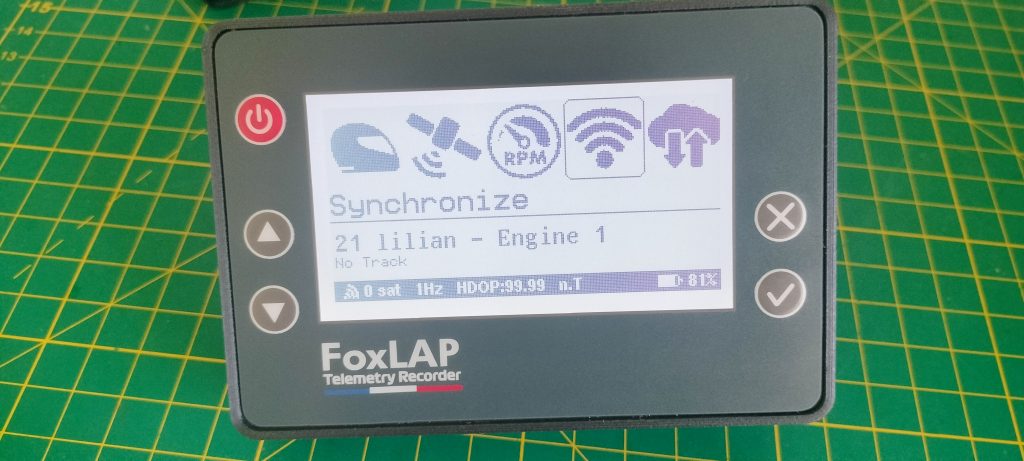
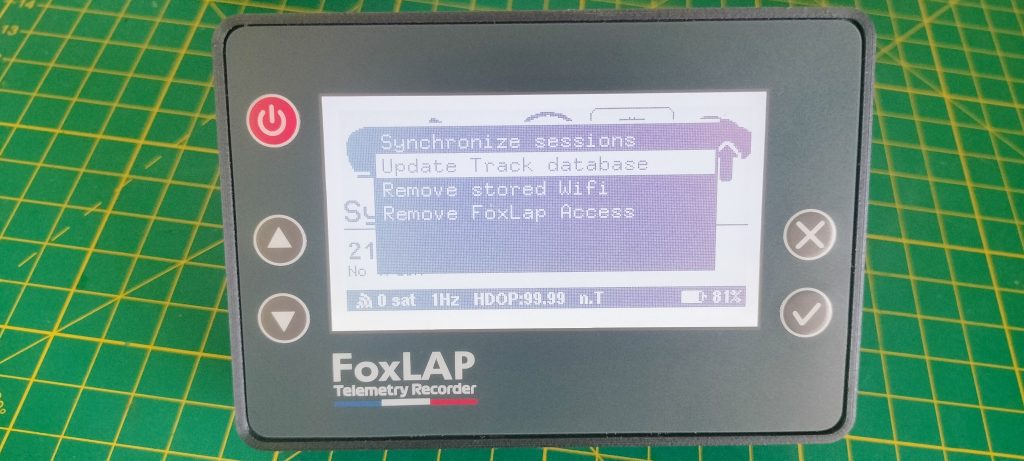
And, on the device, go to the “Synchronize” icon, then click on “Update track databse“.
What to do if your track is not available on the device?
I recommand to create your own track using the provided tool available here https://foxlap.com/track_creation.php
Once the track is created, go to https://foxlap.com/mydevice.php then select your newly created track in “My own tracks” category, then “Save selection”.
And also on the device: go to the “Synchronize” icon, then click on “Update track databse“.
A few tips:
I will add some info/tutorials on how to use everything. But remember:
– There may be bugs. The DIY firmware is a fork from the dedicated board firmware, and i have not tested everything on this DIY version (i’m not using it, the dedicated board is way much better). i will probably install a Bug Tracking Tool here where you will be able to share your issues.
– i can’t predict how good will be the GNSS reception at your location. Here in France, the signal quality is very good. I will add also in the next coming version a way to select yourself SBAS PRNs.
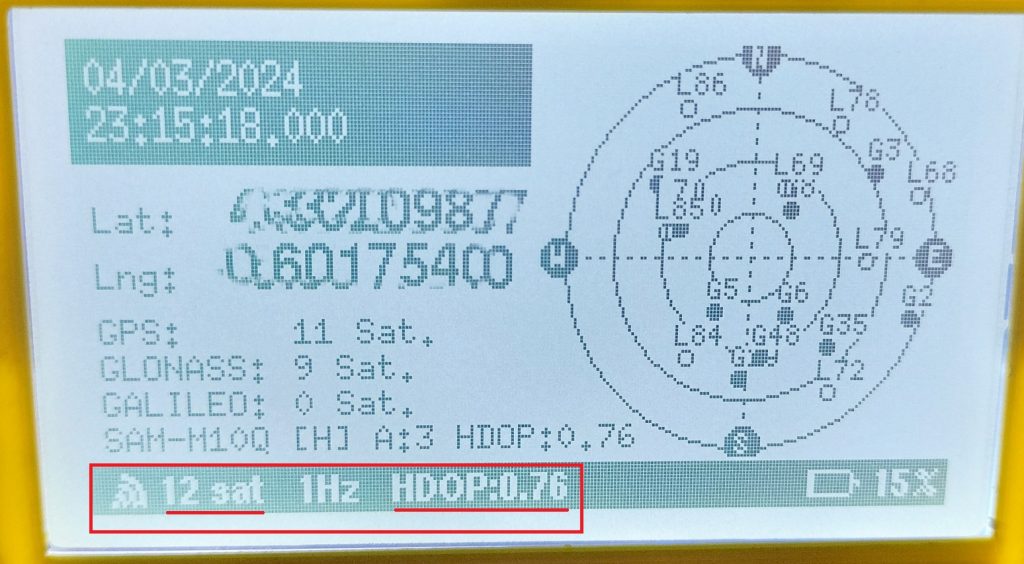
– before heading out to ride on the track, turn on the device and make sure reception is good. You must see in the bottom bar at least 12 satelites and HDOP (horizontal dilution of precision – HDOP must be less than 1 and 0.7 is the ideal. here in France i often get 0.6). turn on the device, leave it still to ensure good and stable reception.
I have some requests regarding commercial distribution. No, you cannot sell this DIY version. Commecial use of this DIY vesion is not allowed.
If you want to become a reseller, contact me.
That’s all for the moment,
Renan BROQUIN
Downoad FoxLAP User Guide
Quick update:
1- Exhaust gaz probe is ready 🙂 the lambda probe is under development
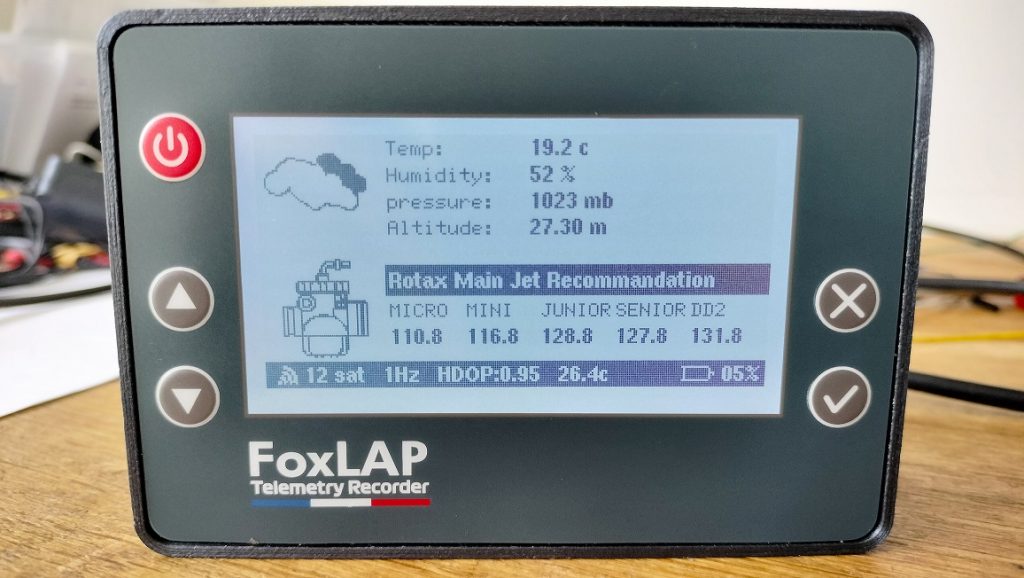
2- The device is now able to retrieve your local weather and calculate the optimal main jet for your rotax engines. The jetting is based on Atmospheric Thermodynamics Calculation. Feature coming soon in the DIY firmware… is it good ?
And the foxlap in action (PCB version)… because it’s a lot of boring tech things here, don’t forget to get fun:

Hello! I have followed you since the beginning of the project, I am interested in the dedicated board, to be able to connect sensors When will it be available? Greetings, you have done a great job!
i´m interested too 🙂
hola buenas tardes me interesa, me gustaria adquirir esta vercion, para poder hacerla para uso personal y experimentar en la electronica, saludos desde argentina
Hello! 😀 great job! already have the firmware ready?
Stumbled across your project, wow you have put a lot of work into this.
The DIY version looks great .
I started building something a year ago to check what my motor is doing but life keeps getting in the way. When time permits I am still modifying and improving.
So far I have RPM with LED indicator, temp and GPS data.
Watching with interest as your project evolves.
This is something!!! Currently printing and waiting for a screen. Would it be simple enough to adapt code for an e-ink screen? I think on an outdoor track would actually be the best readable kind of screen. When will firmware available? Thanks.
I `m waiting for last part of the tutorial. Thank you for your help. If you accept if you want I pay you some beers! Thank you!
I’m really looking forward to the firmware and continued assembly training. You do cool things.
Flashing the firmware on esp32 works like a charm. I still have to do some welding, and then test the device on track. I’ ll be back soon with the review.
how was it?
He probado por fin el dispositivo y es realmente increible y fiable, no me esperaba tal precision .
Gracias por compartir el gran trabajo que has hecho.
Si que es verdad que hay algun bug pero el trabajo es excelente sigo esperando nuevas versiones de firmware !
Gracias y genial trabajo.
well done. Please message me to share any bugs you found.
Thanks, I was waiting and checking your website every week since I found it, I will try the DIY with my pitbike.
Thankyou so much 🙂
Hola de nuevo! Los principales errores que he encontrado son relacionados con la tarjeta SD cuando cargas perfil o tracks, hay veces que genera un bug y se debe resetear por completo el dispositivo ( incluso formateando la tarjeta SD), tambien me ha pasado cuando exportas los datos desde el dispositivo via internet que tambien ha habido que formatear todo perdiendo las sesiones guardadas, por lo que recomiendo antes de subir los circuitos hacer una copia en el ordenador previamente para no perder las sesiones.
Mejoraria el sistemas de dashboard haciendo posible subir las sesiones desde el pc ( que esta la opcion pero no se puede ejecutar) y no via internet desde el laptimer ( es mucho mas lento y poco fiable).
Tambien daria la opcion de subir archivos al dashboard con el formato de Alfano para poder comparar vueltas con los demas pilotos, o a traves de GPXrender algo mas intuitivo que te permita guardar la vuelta rapida como en web para poder comparar mejor.
Insisto todo esto son criticas constructivas, el aparato es lo mejor que puede haber a nivel casero, y seguire probandolo e intentando ayudarte.
un saludo! nos vemos en instagram @pitbikezaragoza
What kind of sdcard do you use? seems like read/write errors…
Uso una tarjeta Verbatim class 10 de 16 Gb (modelo 44082)
i only had the issue you describe with bad SDCards.
i had good results with this little sdcard (Transcend – 4GB) not expansive. i had them at 4.7€
https://www.amazon.com/gp/product/B07JH48HBL
This weekend I’ve tested the device,.it’s magical, works flawless without any bug. It is very precise and accurate. The online dashboard is also great you can analize and compare the lap times. This is for real.the best laptimer ever done.
Hello, thank you so much for sharing this tutorial with us! This device is so amazing!
I got one fault, when I tried to record an own track. The device always shuts down and reboots again.
Can you tell me on which pin no the RMP signal can be attached? Or is it possible to get the scetch of the programm to customize it more and more to my preferences?
Thank you so much!
Best regards
Achim
ok, i will try the “own track recording” function on the DIY version to correct it
I can confirm this problem, could this be because you don’t have any tracks nearby? Because when you are around one track, the recording function is working.
The solution is to create your own new track using map editor, then synchronize your device and Update Track Database. The explanation is you can’t drive on a track that does not exist into your device. It’s just like you try do drive a car but you don’t have the maps loaded on to your GPS device.
Hello!
One more here. I first tested the foxlap on known track (with a little change) and worked great.
I tried to show my friend close to my house, but it kept restarting as soon as we started moving.
If we click “create new track” and don´t move, the device was on.
As soon as we moved one meter, it restarted.
Hi, excellent and fun to start playing around with the device.
As many had said before great job, and I look forward to test it on track.
It looks like I need the 38 pin esp32 borad since you use the GPIO0 pin for display RST. Would you consider change that pin assignment if possible to make it 30 pin board compatible for the simpler DIY version.
Regards Johan
hi johan,
correct, maybe i will do it if i have time to focus again on the DIY version. i made this DIY version in January 2022 to start the development and see if i can get interesting results (the extra pins are interesting to add sensors). I dropped the development board for a dedicated board in may 2022.
This issue is really a nonissue, it was just that I had some 30 pin boards at hand and no 38. Now I have to wait a few days for new boards. 🙂
Would you consider releasing the DIY version as opensource. You could put whatever licensing limitations on it as you want to keep people from doing stuff you dont want with your work. Then we tinkerers can do these small tweaks and perhaps even contribute to your product.
For my part I just want the accurate gps tracking features. Will run dual devices for engine monitoring until I can get hold of a “fancy” one 🙂
Regards
Johan
Dealing with the same issue. I would love for it to be placed on GPIO4. My 30pins have everything but 0.
GPIO 0 is the boot button. The boot function uses this GPIO pin. You can connect to it, but if you’re unsure, you can use a multimeter to test if the GPIO0 pin on the chip is connected.
You are amazing, every week you come up with another magic function. Do you think you can post the new firmware this week? We are heading to our race on friday early in the morning. Thank you in advance.
i will try to publish it tomorrow…
Hi,
Thanks for all the great work and for sharing! About the 18650, can we make the slot provided in the box slightly longer so that we have the option to use 18650 with protection? Or is there protection already built in to the circuit?
Hi,
Is there circuit protection for the 18650 battery? Reason I ask is I was thinking of going with a protected 18650 but those all have the protruding top; not flat top. Is it possible to amend the 3D drawing to allow for some extra millimeters to accommodate a sightly longer battery?
Thanks,
you are afraid about over-discharge? the PCB is dealing with this issue; but the DIY version is a (too) very simple version. you can modify the 3D design if you want to add extra circuitry.
I’ve flashed the new firmware, it’s great that it can be flashed by wireless. What algorithm is it used to calculate the main jet? On my phone a have two applications, the free one gives me a value of 115. and the payed one gives 122. The new foxlap feature gives me a 118 value, so it’ somewhere in the middle.
Today is June 8th. I built my first DIY device and have already upgraded to firmware 1.2. So far without a case and without a GPS sensor. But it’s already working and I’m very happy about it. I am looking forward to the opportunity to connect the RPM of the engine. By then, I’ll probably have made my own case for it and connected the GPS. Question: Is there any button anti-shattering in the program? I often get false positives when pressed.
Hi,
For the display, I don’t see the model you mention on the N.American version of AE. I only see this – https://www.aliexpress.com/item/32818052799.html?spm=a2g0o.productlist.main.1.5399581bWezmxC&algo_pvid=ab72c4be-7784-451d-b43c-45a3a3bd73ad&algo_exp_id=ab72c4be-7784-451d-b43c-45a3a3bd73ad-0&pdp_npi=4%40dis%21CAD%2118.43%2118.43%21%21%2113.12%2113.12%21%402101e9a217186835696836000e4562%2167306057772%21sea%21CA%212851139477%21&curPageLogUid=DzOdIqsqyMI0&utparam-url=scene%3Asearch%7Cquery_from%3A
The dimensions are slightly different to the one you used. Will this cause an issue with the 3D-printing?
The dimensions for my version:
Outline Dimensions: 79.4*62.8*6.4mm
Active Area: 71.74*38.46mm
The dimensions for your version:
Outline dimensions: 72.1*56.4*6.1mm
Active area: 66*37MM
Hi,
I am going to use a 3D printing service as I don’t have a 3D printer. In the configuration page, I am offered options such as Supports (Enabled or disabled), Wall count (Default 2), Top Layers (Default 2), Bottom Layers (Default 2), Ironing (Enabled/Disabled). Do you know what choices I should make for these options?
Thanks,
Hello,
Congratulations excelent project, it is the best project in its category that I have ever seen.
I maked a working prototype, but FOXLAP only shows a maximum of 10hz (I’m using the Mateksys SAM-M10Q GNSS module).
HDOP is always close to 0.7.
The SAM-M10Q datasheet states up to 20Hz for GPS+Galileo or 18Hz for GPS only.
Could you tell me what the problem is?
It seems to me that in firmware 1.2 I lost the Glonass signal, I already did the configuration and it didn’t solve the problem.
How export GPX file from the FOXLAP website to analyze the Hz?
Thank you
Bonjour
Personnellement, j’ai pas la patience de collecter tous les objets sur Aliexpress.
J’ai ete au plus rapide….
Mini ordinateur windows 11 avec processeur N100 et un ecran tactile de 5 pouces etanche
Total 120 Euros sur Ali livré en 2 jours…;
Est t’il possible d’ajouter une lecture a partir d’un port ou usb pour le gps et aux capteurs depuis le logiciel sans avoir a monter la totalité de l’artefact….,????
Je m’explique, l’ordinateur peut afficher la carte en direct grace a googgoole, et la partie chronometre avec la trajectoire son enregistres en dur sur le pc embarqué (ok ok, 1kg en total en plus) en lecture instannée… de ce fait on peut comparer en réel (afficheur tete haute dans le casque….) On tue le game la mais…..je peux envoyer des photos de mon montage….
Hello, I’ve built one of these devices but when I look at the schematic you have the buttons connected to the 3v3, but in the tutorial you have them soldered to the ground, I’ve soldered them to the 3v3 on the ESP but they don’t seem to be detected by the device, Should I resolder these to the GND? Thanks
Yes, buttons have to be connected to GND. One side of the button is connected to the GPIO pin of the ESP32, the other side of the button is connected to ground (GND).
Connecting a button to 3.3V with a resistor, typically referred to as a pull-up resistor, is a common practice to debounce the Button Presses. It is not mandatory to debounce the buttons but it is recommanded
Thanks for the quick reply, just resoldered it to the ground and its working great, really appreciate this project, going to the track this saturday to test it out can’t wait 🙂
Hi,
I ordered 3d prints for all the parts and I picked them up today! Exciting times! I am trying to attach the button holders. Should there be a gap between the bottom of the button holders and the buttons?
Actually, all good! I see from the pictures that that the push buttons have to go in the button holders!
Hello, I tested my device several races and it is fabulous. 🙂
Having the lambda and rpm values would be so great. Will you integrate these features in the DIY version as well? This would be so helpful!
Thank you!
I often encounter a problem where, after uploading the sessions, only 8 out of 13 sessions are available on the device. The other sessions are no longer visible after uploading and are also missing on the SD card. However, they are still available in the Foxlap online account. Is there any way to restore them to the device? Can I download them from somewhere? I couldn’t find any information about this on the website.
Thank you!
Unfortunately the esptool.exe does not work on my win10. So I tested some other software to flash the esp32, but I couldn’t get the board into flash mode. In my case only a web flasher solve the problem.
https://nabucasa.github.io/esp-web-flasher/
Maybe it will help someone how does have the same problem.
Very very nice project!!
Hi. It’s a nice project but with some issues. First of all and the most important part of this project is the gps and I used in my configuration a neo m8n module but it seems there is a problem. I tried several modules and the issues that it takes too long to get the fix sometimes 40 minutes. My question is can you tell us what is the baudrate used in your source code to communicate with gps? What are the messages you get from gps, nmea or ubx or both of them? At least I can try to flash my module.
Thanks a lot
This project has been designed to use a m10n or m10Q. But it works with an m8n too. Your issue is coming from your GNSS receiver for sure. 40 minutes to get a fix ?
1- You are located inside a building or somewhere you don’t have a direct access to the sky
2- Your GNSS receiver is a poor replica and is not a m8n but a m6n or something else but advertised as a m8n
3- Or it can be an issue with your antenna
The firmware configure the GNSS receiver automatically if an m8n, m10n, m10Q is discovered. So maybe check that you ship is a real m8n
After more than half a year since the publishment of the first firmware for this project, we are waiting for an update that includes the water temp and rpm sensors. Is it possible to have this update in the nearest future? Or we have to buy Alfano or Micron devices?
everything require a lot of time with materials and especialy when it is a spare time project. i’m preparing th tutorial to add external sensors to this DIY laptimer. you will not have to wait so long now.
is this project still supported?
of course. But everything needs a lot of time with materials. i’m preparing the way to add external sensors to this DIY laptimer. you will not have to wait so long now
that was exactly what I wanted to ask xD because the finished pdbs are unfortunately sold out
Wow! This is great news. Can’t wait to try it out.
Awesome project!
Its posible to add magnetic sensor for indoor use? (Only laptime)
At this time no… but maybe if i find the energy to do it
What a great surprise, this year Christmas came earlier, can’t tell how happy you made me by publishing the new firmware release. If you tell us what sensors do we need or you can sell them and publish the 3D model for the back case we can consider that the new year came also earlier.
You are awesome 👍
Hi,
I built the DIY version and I bought the sensor box. I assembled everything and it works nice, except one thing.
If sensor cables between ESP32 board and M8 connector are touching each other, then I have RPM signal around 13800-13900, so these 2 cables are interfering.
Can you suggest what to do with this problem?
Thanks in Advance!
RPM is very sensitive, the GPIO is in floating state on the DIY version (that was the best configuration i tested on this very simple version of the device). Your engine generate a lot of EMI. avoid to have the RPM cable from the M8 connector touching anything else. try to isolate this cable to let him go to the GPIO. Use the star grounding technique. let me know if you need assistance.
Its a really useful thing to know! I also ordered ferrite ring, BUT my biggest mistake was to exchange RPM and Temp cables. Now seems okay, just sometimes peaks of 100-200rpm when the device is standing on my desk. Let me assemble my bike and test it! Anyways if you are interested I designed a whole new case for the DIY version where you dont need to hot glue anything. I can send some pictures about it. It is also smaller in size.
Hi Mark, Could you send me the stl of the case you designed? I would be very grateful to you. My email is josem.grez@gmail.com. Thank you so much.
Hi,
This is an awesome project
I’m testing the diy version and found a few bugs:
1. If guest driver is deleted from the list of drivers (which can be done from the UI), the device wouldn’t load again. It just shows blank screen after loading.
2. Disabling voltage monitor in the settings doesn’t seem to do anything. Battery status is still showing in the bar.
Hi,
I also experienced the same symptom after deleting GUEST driver, so +1 to this bug.
Actually I just realized, this is the reason I have blank screen after loading. I thought I have other problem.
Thanks for sharing this information.
Did you removed the driver directlty in the sdcard filesystem or using the interface on the device?
i can’t reproduce this issue.
Hi, sorry for the late reply. If you haven’t managed to reproduce the issue, it appeared on both v1.2 and v1.3 software versions and was apparent if the guest driver was removed either way, from the file system or from the user interface.
Good Morning.
I have been working on the DIY timer and followed the directions. I have flashed the hardware and rebooted but other than the screen lighting up I am not getting anything on the display.
I am a bit of a novice but I have checked the wiring and cannot find anything obviously wrong.
Are you able to suggest any possible advice?
Thank you.
Are you using the same display as recommanded? it must be coming from a wiring error. display initialisation showing the bootscreen is one of the first thing the device is trying to do. if you see nothing except the backlight, there must be an error regarding wiring. can you shar pictures of your wiring on the display and on the esp32 ?
I have taken a couple of photos. How can I share them with you?
Would it be possible to use the GPS from the link below internally?
It has a much better price compared to the others.
thanks.
Hello, there is no plan to make it compatible with other GNSS. Only uBlox
It takes a lot of time to test a GNSS, and most cheap GNSS do not give good results. I stick with what I know and what I know gives good results
Ciao
during a test a bad lap has been recorded and now is fixed as best lp of that circuit, that is wrong. I have already deleted this session on Folap and also on online account but wrong best lap still remain linked to the circuit. How can i do to remove it?
Thanks a lot in advance
Ciao
Andrea
Solution 1: On the device, Go to “Tracks”, select the wanted track (your location must be near the track). Then on the menu, click on “Reinit Best LAP”. you will no more have a best lap recorded for this track.
Solution 2: (The free way) remove the SDcard from the device, insert it into a computer. Open the file “drivers.xml” located at the root. you will see in this file the UID of the driver. This UID is also the name of a directory located at the root of the sdcard. open this directory, and open the file “record.xml”, you will be able to edit the content and change the best lap time with whatever you want. ATTENTION to formatting.
I have a suggestion: Do you think it’s possible to display the water and EGT temperature values just like the RPM value, outside the Lap Recorder menu, without the need of GPS signal? It can be useful when you are inside of a garage, so don’t have GPS signal and you want see those values.
Good Idea. in the RPM monitor Mode (remnant of the time when I developed RPM capture), you can also see the water temperature, in the bottom bar (small but here). i will add a sensor monitor mode without the need of GPS. in such a small display, it’s always a challenge to put everything i want to put – please don’t say that i must develop a version on a larger display – It’s only a side project and it contains far more than i expected at first – Stay tuned for a new firmware update
From hardware point of view I think your project has reached it’s goal, it has everything a kart driver needs In terms of software there will always be improvements. Another idea, I don’t know if it has been implemented or not because I haven’t been in that situation, is an alarm for temperature, if the water or EGT temperature grows above a limit preciously set up, the screen may blink and display a message or the temperature with a lage font so that the driver can see there is a problem with the engine or cooling system.
Yes it has been implemented. you can set limits. Your custom limit (usually and by default 55°c for rotax) invert the water temperature color in the display (you can’t miss it). and an hard coded limit with a huge alert on a the display (80°c or 85°c) saying that might must stop now… Try not to put yourself in the situation of seeing this screen.
Hey, I am using this very nice device on my Pitbike and I would like to use the watertempprobe as a oiltempprobe. Is it possible that you make the hard coded limit variable. Otherwise I fear that I will get the huge alert all the time. Thank you so much.
yes it can be done
Thank you! This would be so great! Do we have then the possibility to choose if „Wat“ or „Oil“ will be displayed? 🙂
what is the maximum temperature the oil can reach ?
I’m experiencing a lot of slowness when synchronizing sessions from my device to the online platform. It takes 5 to 10 minutes for a session to be transferred.
I’ve tested it on several WIFI networks, all with high speeds, but I always notice this slowness.
Can anyone tell me if they’ve experienced this before or if there’s any way to fix it?
You’re right that the ESP32’s Wi-Fi throughput can be a bottleneck – 5–10 minutes per session is unusually slow. Here are a few things to try:
Reduce file size: Lower your GNSS update rate (e.g. from 25 Hz down to 10 Hz) in Settings > GNSS Mode. Fewer data points mean smaller session files and faster uploads.
Optimize your Wi-Fi link: Make sure you’re on a 2.4 GHz network (the device doesn’t support 5 GHz).
Position the device as close as possible to the access point, with minimal obstructions.
Check for firmware updates
We regularly improve transfer performance. download and install the latest build.
hello and compliments for your project. I have a problem: at startup the system does not see the sd memory. The message “waiting sd card” remains for a while and does not detect the memory. Did I do something wrong in the installation?
Hey! I recently have built your dyi version and it works great.
The only thing it needs is a live time delta (to show your time live in comparison to your fastest time during each lap, so you can see exactly where your are faster or slower while driving).
I think this is a really popular feature and I wanted to ask if there is a way I get my foxlap timer to show a live time delta?
I look foward to hearing from you! 🙂
– Harry
done in firmware V1.60
This little thing is getting better and better!! 🙂
Would it be possible that you make one additional screen, so that only the value of live delta is visible over the whole screen (big numbers)?
And perhaps switch the color of numbers and background when the value is positive to see that we are slower without reading the numbers.
And would it be possible to get this live delta for each segment compared with the fastest segment?
Thank you so much!
Best regards
Thanks for the recent update, you are doing a great job.
I have another idea for a new feature:
It would be nice to connect a small LED strip that lights up green when the live time delta is faster. This would work similar to how the Mychron and Alfano systems show a green light when you improve your lap time. The green light is just a quick way to see that you are going faster, without needing to look at the screen.
This could be done by soldering a small LED strip onto the board. Here is an example LED strip: https://phaserfpv.com.au/products/tbs-tiny-leds-femto-8-led-4pcs?variant=31904785825869&country=AU¤cy=AUD&utm_medium=product_sync&utm_source=google&utm_content=sag_organic&utm_campaign=sag_organic&gad_source=1&gad_campaignid=21891404095&gbraid=0AAAAAC7E5-QeRY2rC9ne-dw9-BvtuQb8V&gclid=Cj0KCQjw5JXFBhCrARIsAL1ckPtGefUGCSYGIaxiAsJ6LTvJ_8IwaN8y87EiY2-WSJIL5kDzsgyix3AaAtoNEALw_wcB.
These strips are often used on FPV drones and usually have three pads: ground, power, and an LED pad for controlling the color and effects.
Do you think this could be possible to add? I think it would be a really cool feature!
next coming version will allow LEDs
Kinda have a question after i flash the board and i think i did it properly i have the backlight just showing can’t see any boot on the screen i re did the wires multiple times so im kinda confused if its the flash or my supidity
Typically, this indicates either that the wrong firmware was flashed, the flashing process failed, or there is an issue with the wiring that needs to be checked.
Expanding on Harrison’s Idea for Delta time with programmable LED Strip,
The leds can also be used as a Tacho
similar to https://github.com/MickTheMechanic/Shiftlight
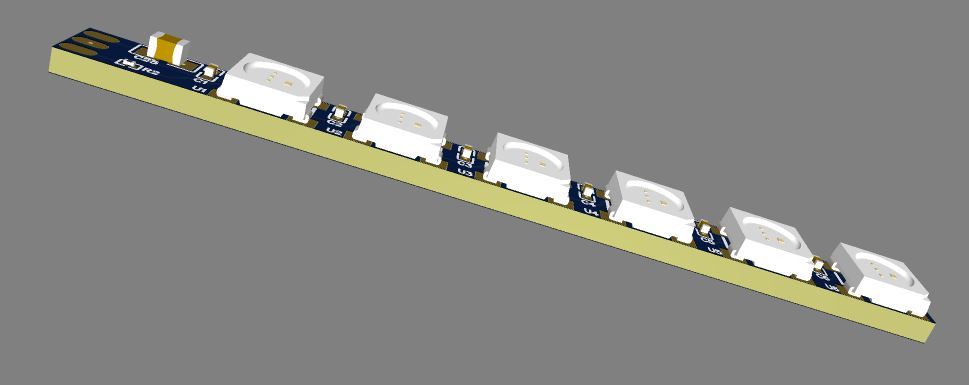
Yes, I’m working on this addon. Six LEDs will be able to display, depending on the chosen mode:
– RPM level as a bar graph
– Live delta indicator
– Sector times (2 LEDs per sector, green or red — no need to explain what that means)
– … if you have any ideas … please tell me
These NeoPixel LED strips are affordable (as shown in the picture) and work as a quick-and-dirty solution, but under direct sunlight they’re almost invisible. That’s why they won’t fit our needs. I’ll have to use brighter LEDs with directional lenses instead. I will post on the progrees of this addon. i’ve already made a prototype.
Can this led strip also indicate charging progress of the battery while charging? Let’ say 1 LED turned on for 20%, 2 LED’S for 40% and so on.
Could you tell me which GPIO we could connect the signal to the LEDs to? I’d like to test it.
Thank you
If you make an option to use 8 led strips, that would be awesome, as there are already pre-made modules on aliexpress.
Good morning, the new version has a “godMode” option in the settings menu. What does this function do?
Thank you.
Here are some hardware options available for debugging and testing purposes. The content may vary across firmware versions, depending on what is considered useful or not:
Brownout Detection is a safety feature on the ESP32 that monitors the power supply voltage. If the voltage drops below a safe threshold, the ESP32 automatically resets to prevent unpredictable behavior, data corruption, or potential damage to the chip.
In some cases, you might choose to disable brownout detection—especially if the ESP32 is powered by an unstable source, which can cause false brownout triggers and unnecessary resets.
By default, brownout detection is enabled.
PCNT (Pulse Counter) is a hardware peripheral on the ESP32 used to count digital pulses (signal transitions) on specific GPIO pins.
It is disabled by default and typically does not need to be activated unless specifically required for a particular use case.
Hi. Syncing from the device does not work. I do not know after which update this happened, but when I select sync, the FOX Lap account verification message appears, followed by a list of Wi-Fi networks. I tried to re-flash the device through the cable. I formatted the card, I deleted my account on the website and opened a new one in another mail. NOTHING HELPS. I even changed the microcontroller to another esp-32. That didn’t help either. Why did this happen?
seems to come from your location… don’t know why yet, but you are not alone from this country to get issues with sync. am working on it to get the solution
Thank you for your response. Even VPN authorization doesn’t help. When I first assembled the device, everything was fine. This happened around spring, starting with version 1.58. I will try again using different networks. If it works, I will let you know.
i may have firmware versions for you to see if it solve this issue (contact me via email) – But from what i see, it is not coming from you nor from me. i know that using VPN don’t work.
i had 2 or 3 users from your country with the same issue (i think it is related to DNS). i’m working on it.
i send email via “Contact us”
Solved in firmware v1.68.
Setting => Synchronization mode => 2.Secured
(The TLS stack consumes a significant amount of memory and leaves the heap fragmented. Use this mode only if the device cannot be synchronized in the default mode. In secure mode, the device will restart after each synchronization process because the heap remains too fragmented, and restarting is the only way to restore a clean heap)
Is there a change to manualy change GPIO0 pin to like GPIO4, because i have nowhere to connect RST pin from LCD, and everything seems to turn on, but lcd is only backlighting blank screen. Or should i buy different ESP32, with 38PINS?
Thank you, love this DIY, very well done.
Connect RST to +3.3V: it will probably work, but you lose the option of a software reset (never tested, let me know if it works)
Leave RST unconnected: the display may rely only on its internal power-on reset; sometimes it works, sometimes it doesn’t (risk of random behavior).
Best practice: keep RST on the given GPIO. No there is no way the change the GPIO
Connecting RST to 3.3V didn’t work still blank screen, I just bought different ESP with 38pins, and it works flawlessly.
Thank you so much.
I’m in Lithuania, but while testing at home, i have a problem with satellites doesn’t want to connect, or with only 1-2. HDOP very high.
What GNSS chip are you using? Install the device in a fixed position, outside with a clear view of the sky. On the first launch, satellite acquisition may take a few minutes.
Yes, it was my bad, sorry. Messed up with GPS parameters.
Already tested lap recorder, works fine, love it.
Is there a possibility for myself to change gpio0 to gpio4. Or there is no chance?
In the device settings, we don’t have the option to enable the accelerometer.
Does the dedicated version have an integrated accelerometer? Would it be possible to connect this module to the DIY version as well?
Thanks
hello my friend, with this project, you save my life:)…..I need to implement my foxlap with the exhaust gaz probe on the Mini 60 TM. How can I proceed?
You’re the best…..
Hi,
Firstly, thank you for sharing this awesome project. It is truly interesting and helpful for those interested in using it while driving rental karts. Also, the cost is significantly lower than buying a MyChron, for instance.
I’ve been using it since last month and I noticed that there is an option to connect a GoPro to it. I got the version.txt file from my GoPro and copied it to the GoPro folder inside the microSD card. When I try to connect to my GoPro, Foxlap shows the following message: “waiting smart remote…”. I tried connecting my GoPro through the remote connection, but with no success.
Can indicate what am I doing wrong? and what do I get by connecting the foxlap to my gopro?
A couple of notes. The build went well. I’m having SD Card issues but I’ll do some more troubleshooting before bugging you. One thing to note, I had issues loading the firmware while everything was connected. I had a spare ESP32 here and flash went perfect. I was getting “Wrong boot mode detected.” I have no doubt removing a bunch of wires would have fixed it, but holding the boot button while powering up the device put it into the right mode and I was able to flash with everything still connected. Maybe add a note somewhere that flashing before assembly is a good idea. Someone else mentioned this, but it would be great if you could release the code for the DIY image. I realize that would be hell to support, but you can disclaim your way out of that. Thanks for a cool product, I can’t wait to give it a try!
I replaced the bad SD card shield and it works perfectly! I got to try it out today, I’m using it in a car and adding the tracks with the track editor. There is nothing else that works this well for the price. I recommend buying the board unless you are big electronics geek though. It was not easy building and troubleshooting the DIY setup.
Is it possible to add RPM reading to the DIY version?